
Building a wearable camera
Recently I worked on a side project where I built a wearable camera out of a Rasperry Pi. I had previously bought a Narrative Clip and was a little disappointed by quality and knew hacking together my own solution could be possible. I was also about to go on a holiday where I would be traveling to 4 countries in 5 days, so the timing was perfect.
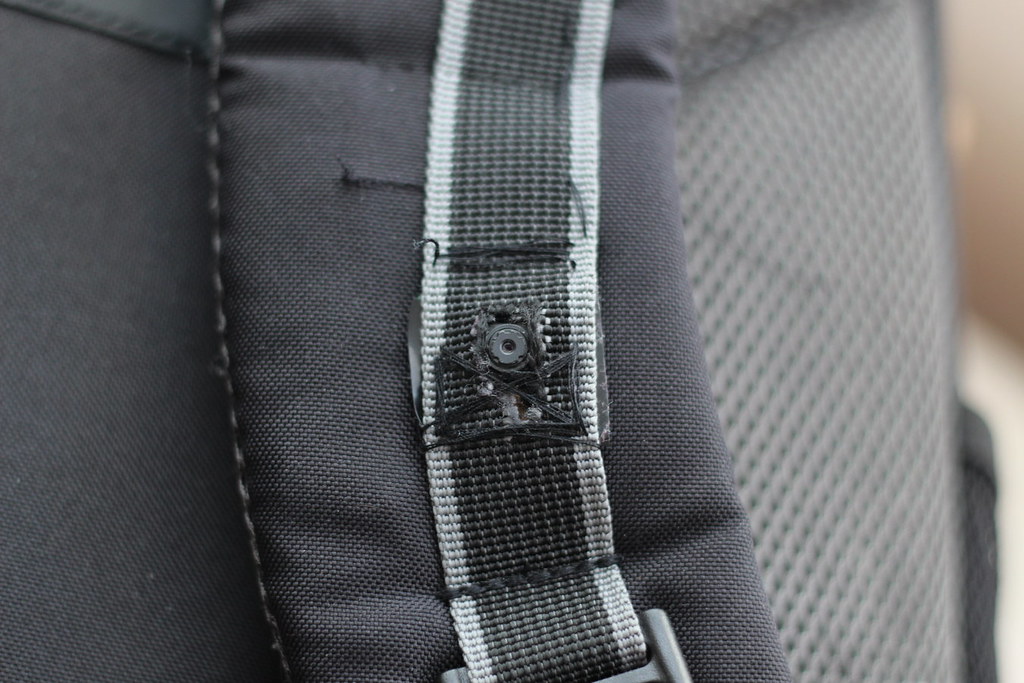 I started off by punching a hole through the strap on my backpack and sowing the Raspberry Pi Camera Module onto it. The ribbon cable was then wheaved up the strap and fed into the top backpack for the Raspberry Pi.
 The main reason for this was to protect the naked electronics from rain as well as keeping it tightly attached to my bag so I didn’t have to keep repositioning it like I was having to do with the Narrative Clip.
This ended up working fantastically and it solved both the alignment problems as well as keeping all electronics perfectly waterproof. The image on the right shows my bag completely drenched from heavy rain in Bratislava.
Adding GPS
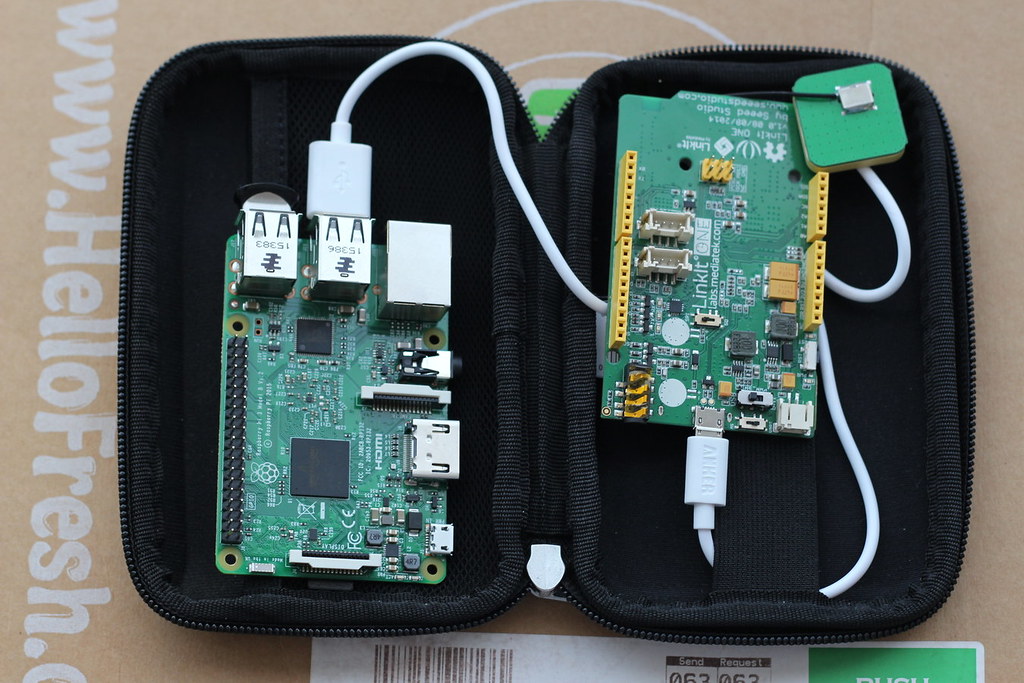
As the primary use for this camera was to take pictures on holiday, I thought it would be great to add a LinkIt ONE which would stream GPS data to the PI and save it as Exif data to every image it takes.
 An interesting thing I learnt about GPS hacking was that it’s either 100% absolutely accurate or throws you somewhere in the middle of Morocco. The accuracy really depends on how many satellites the device detects and I eventually decided not to take it abroad as not much time was spent testing it enough to trust it, but i’m pretty sure it would have been fine.
Building the mobile app
One frustration I had with the Narrative Clip was that I had zero control over when it was taking pictures; it would simply take pictures providing it was charged, continuously, without an off-switch or any insight into if the pictures are coming out acceptable.
I solved this by taking advantage of the Raspberry Pi 3’s onboard wifi chip in AP (access point) mode where I hosted a wifi network with served a flask app which showed me the latest few images the device had taken. The simple interface allowed me to see what was going on, plus giving me some basic controls on deleting or renaming images.
The web-app worked out great and the access point stayed online the entire holiday! This was probably one of the biggest successes of the project as I didn’t expect it to really work. As a backup I also had Apache symlinked to the image folder, which meant if the flask app would die - Apache would simply serve a basic folder explorer for me instead.
RTC issues
An interesting problem which I hit with the project with RTC (real time clock) issues. I knew I would face some problems seeing as the Raserry Pi didn’t have a RTC chip, however it really was show stopper.
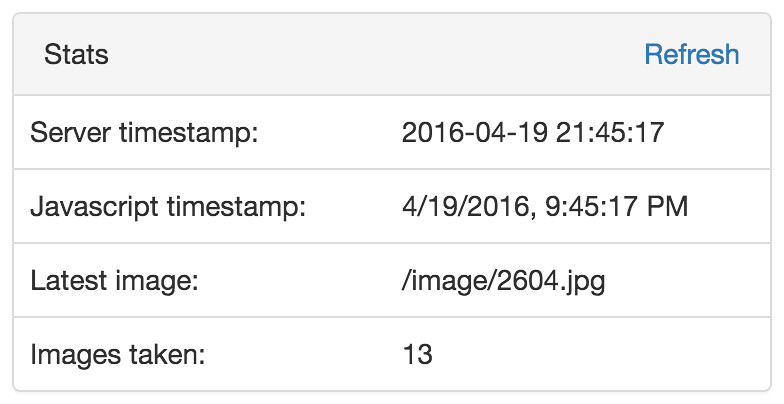
To keep an eye on the issue I added a Server timestamp and Javascript timestamp so that I could compare what time the device thought the time was and compare it with the javascript one which my phone would figure out when it loaded the page.
 After a day of the camera taking pictures, if I turned it off and turned it back on the next morning, it would reset back to the last time it was turned on, which was usually around 24 hours ago. This means it would then start overwriting images it previously took during the holiday, as the images naming convention was based on timestamp.
The solution for this was to try to never turn the device off however the power charger I was using could only last about 30hrs which meant it inevitably died several times during the holiday. Luckily Eastern Europe is still full of internet cafes, so I popped in every day or two to transfer the images to a temporary folder.
A pretty horrible problem for something which could have been fixed by buying a £6 RTC chip!
The final timelapse
The final timelapse video came out great! It was a little time consuming removing all the error images however overall the images came out significantly better than the Narrative Clip. YouTube also made an enhanced version of the video which is really trippy and worth checking out here.
Doing some OpenCV magic
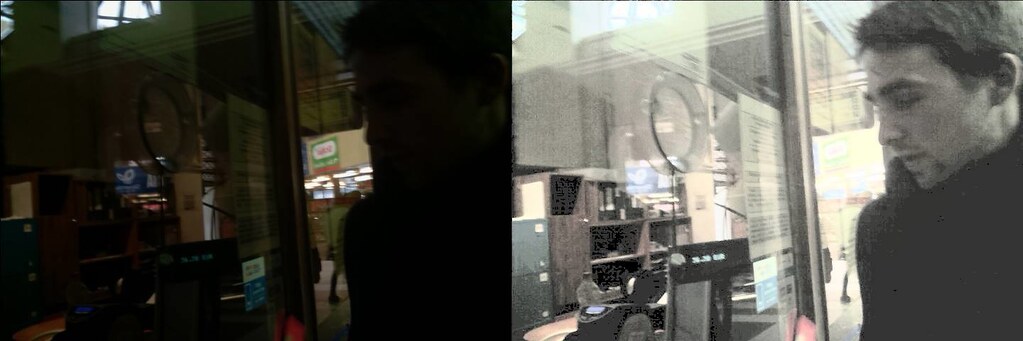 After my holiday I played around with a little bit of OpenCV hacking to try and take full advantage of the images I took. From the image above you can see that you can make some pretty significant improvements with some simple Histogram Equalization work. I didn’t really bother adding enhanced images to the timelapse video though.