
Building a huge display of 576 ping-pong balls
As the end of 2019 slowly approaches I thought it’s better late than never to finish writing up about a project I worked on exactly three years ago in 2016 and never got around to publishing. I’ve had the draft of this post sitting on a trello card for three whole years under a list called “To Do (never happening)” so here’s me proving that wrong!

This summer I decided to do a project I’ve been wanting to do for years by building a massive LED grid for a festival installation. EMF Camp 2016 was soon approaching so it gave me the perfect opportunity to have a deadline to work towards and actually build something cool! What my brother and I ended up building was a huge 32x18 pixel display consisting of 576 individually addressable LEDs across 12x LED strips with each LED diffused by a ping-pong ball. It ended up looking pretty insane!
Installing all 576 ping-pong balls
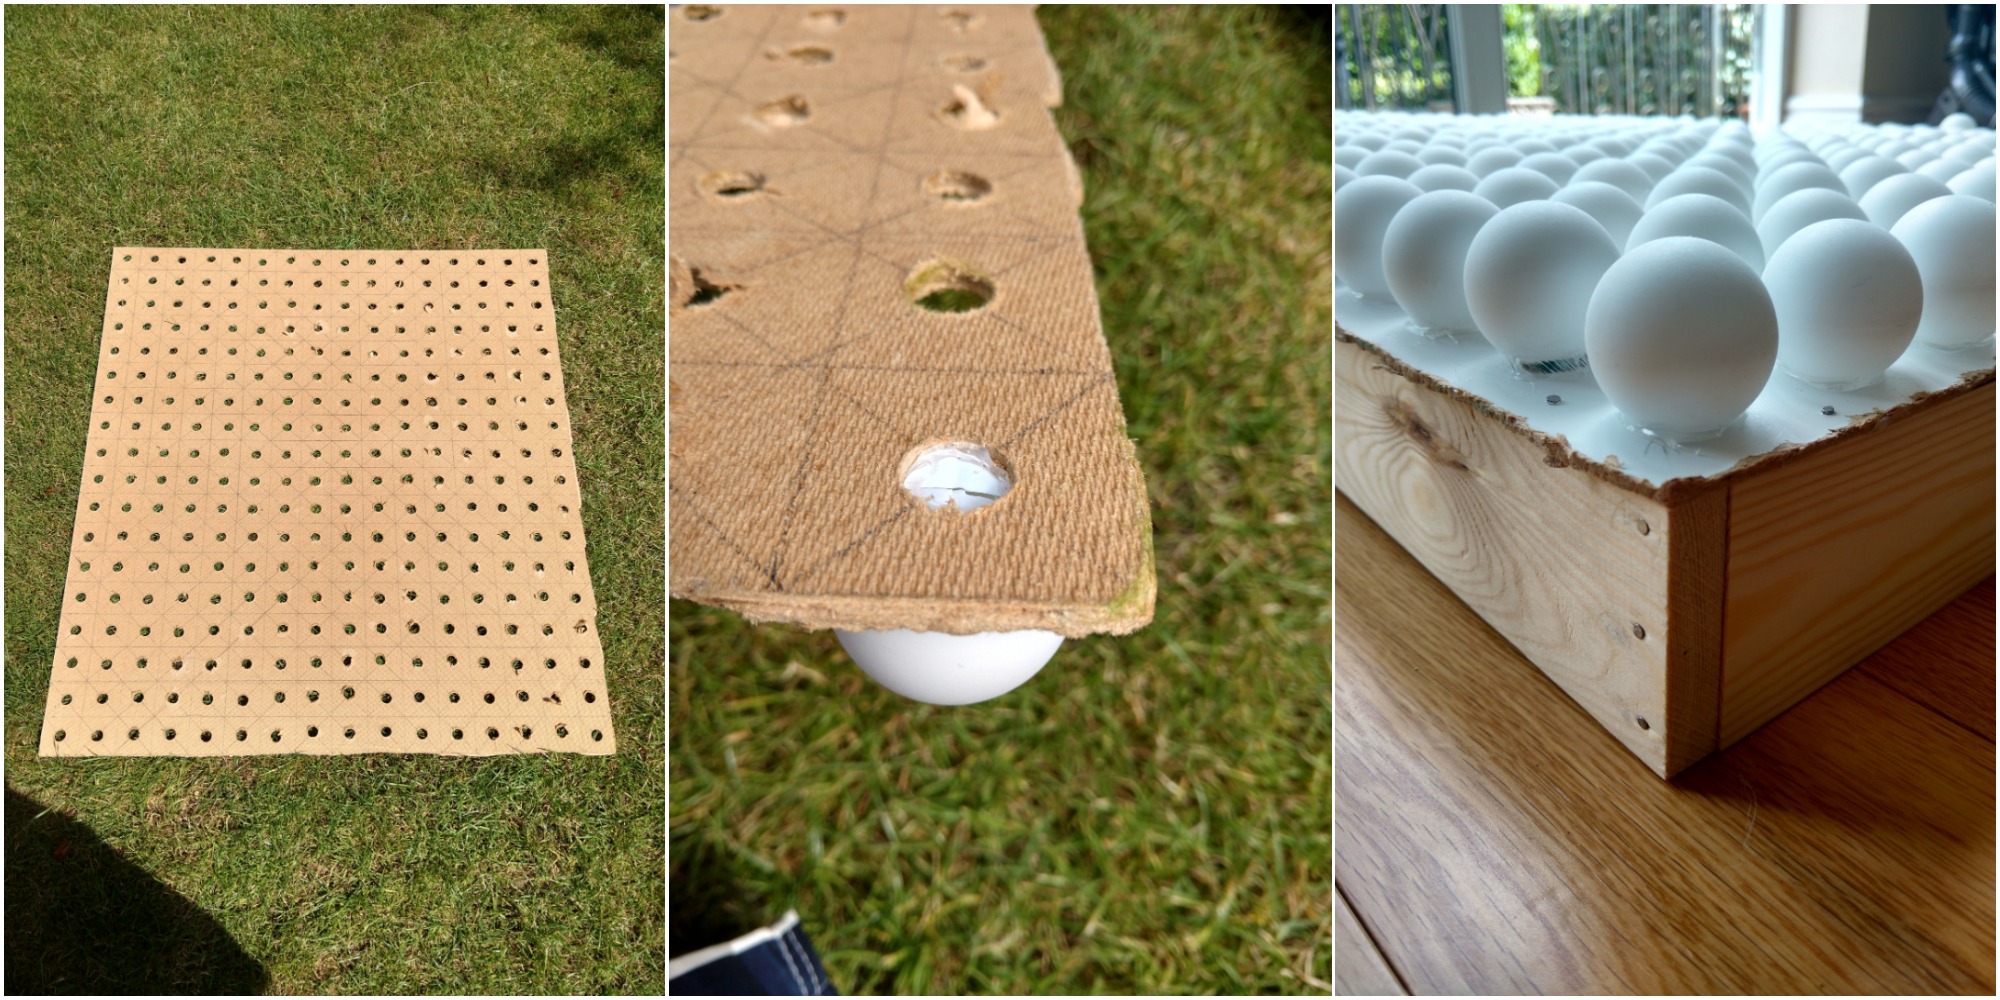 We started off by splitting up our 32x18 display into two 16x8 halves to make it easier to transport and then drilled a hole in the middle of a 5cm/5cm square which would hold each ping-pong ball. After drilling the holes we cut an X shape into each ball before using a hot glue gun to attach it to the main board. Luckily we didn’t need to buy real pong-pong-worthy balls and found some much cheaper “amateur entertainment balls” being sold in bulk on Amazon so we went with those, I think due to the cheap thinner coating of plastic they use it actually diffuses the light from our LEDs much better than regular ping-pong balls, so it worked out better than planned.
Testing the LEDs
![]() I purchased 12x WS2811 LED strips which were specifically waterproof to help protect our project from our famously rainy British summers seeing as the installation would be used outdoors on grass. The slight foggy coating attached to each LED bulb made our ping-pong balls really nicely glow in a gentle and elegant way in the dark too.
I purchased 12x WS2811 LED strips which were specifically waterproof to help protect our project from our famously rainy British summers seeing as the installation would be used outdoors on grass. The slight foggy coating attached to each LED bulb made our ping-pong balls really nicely glow in a gentle and elegant way in the dark too.
Wiring things up
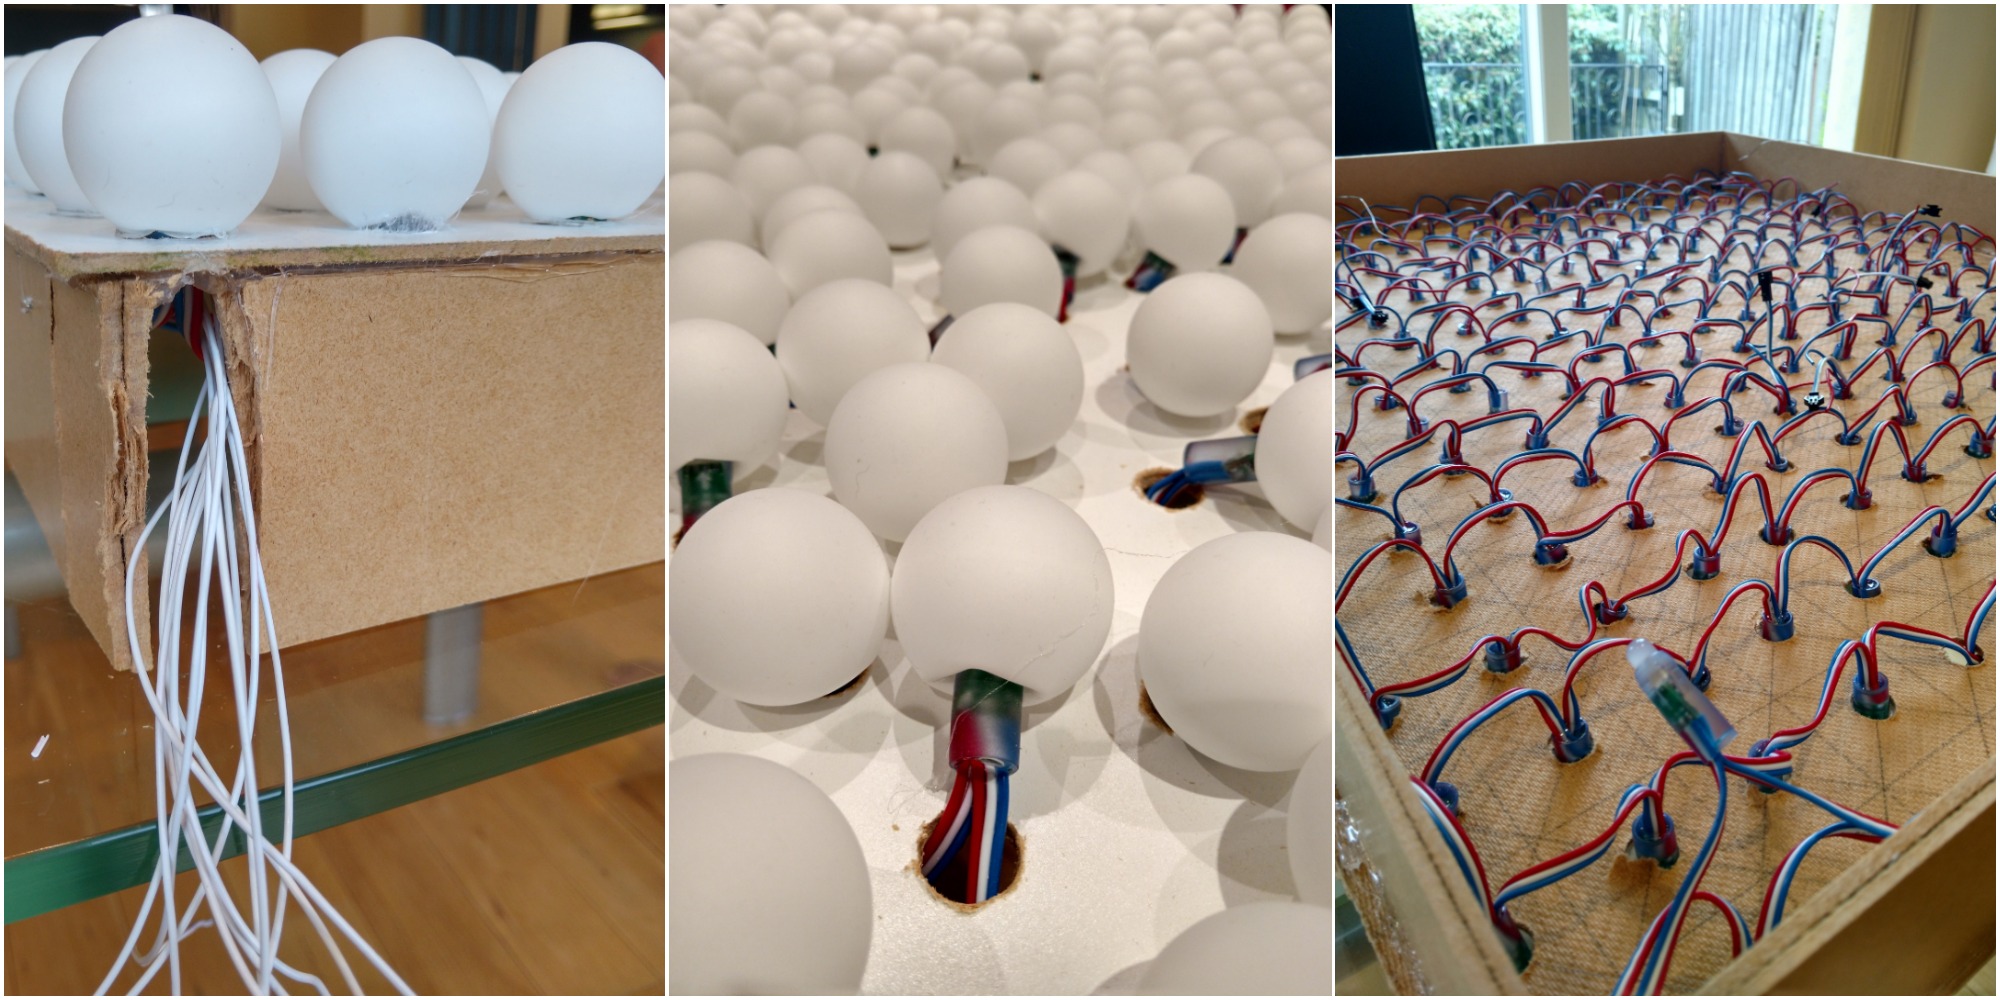 Wiring it all up was great fun. We had to feed each LED into the designated hole for it, use a hot glue gun to glue the LED in place and then hold it for a little moment for it to cool down. It was a pretty quick process and pretty therapeutic.
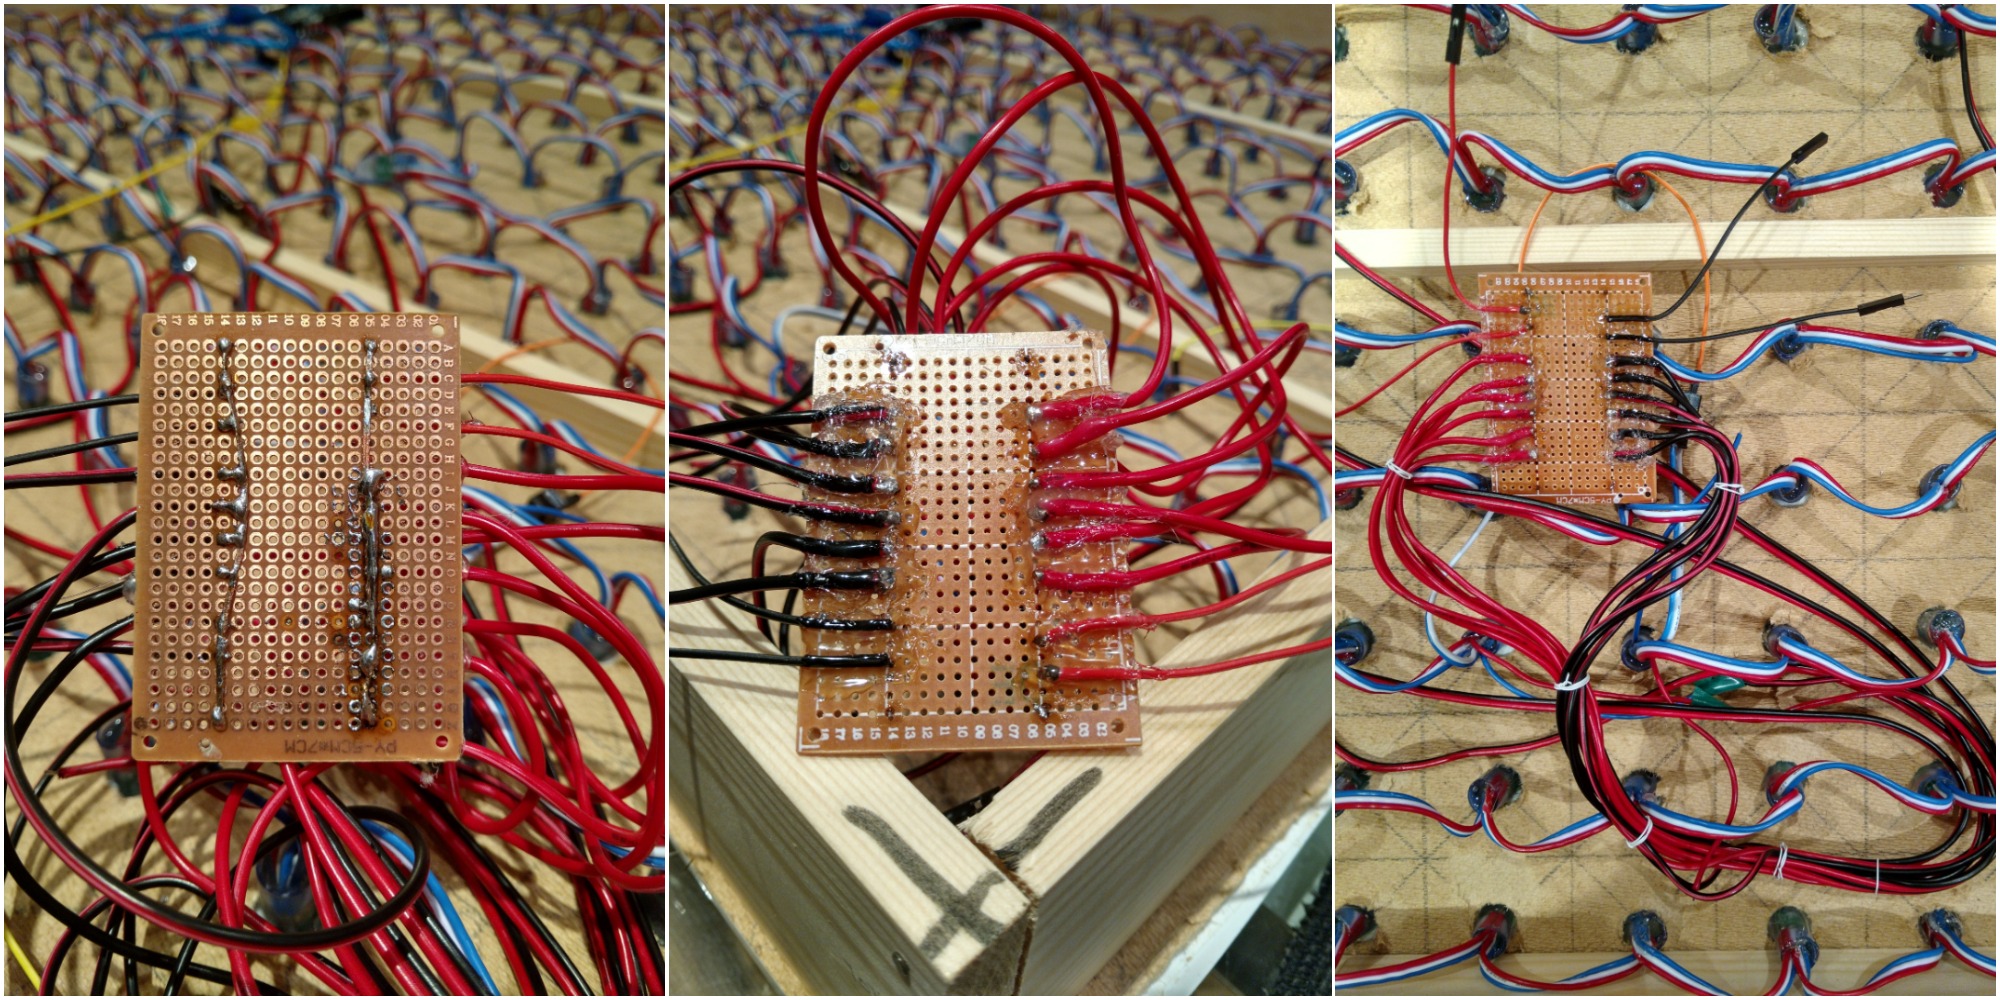 Each strip’s 5V and GROUND inputs were fed onto a copper PCB board so they could all share the same 5V and Ground inputs from a 50W Regulated PSU which would feed the entire grid power. The data inputs and outputs were all daisy chained together which sounded acceptable at the time until everything went wrong…
IT WORKS!
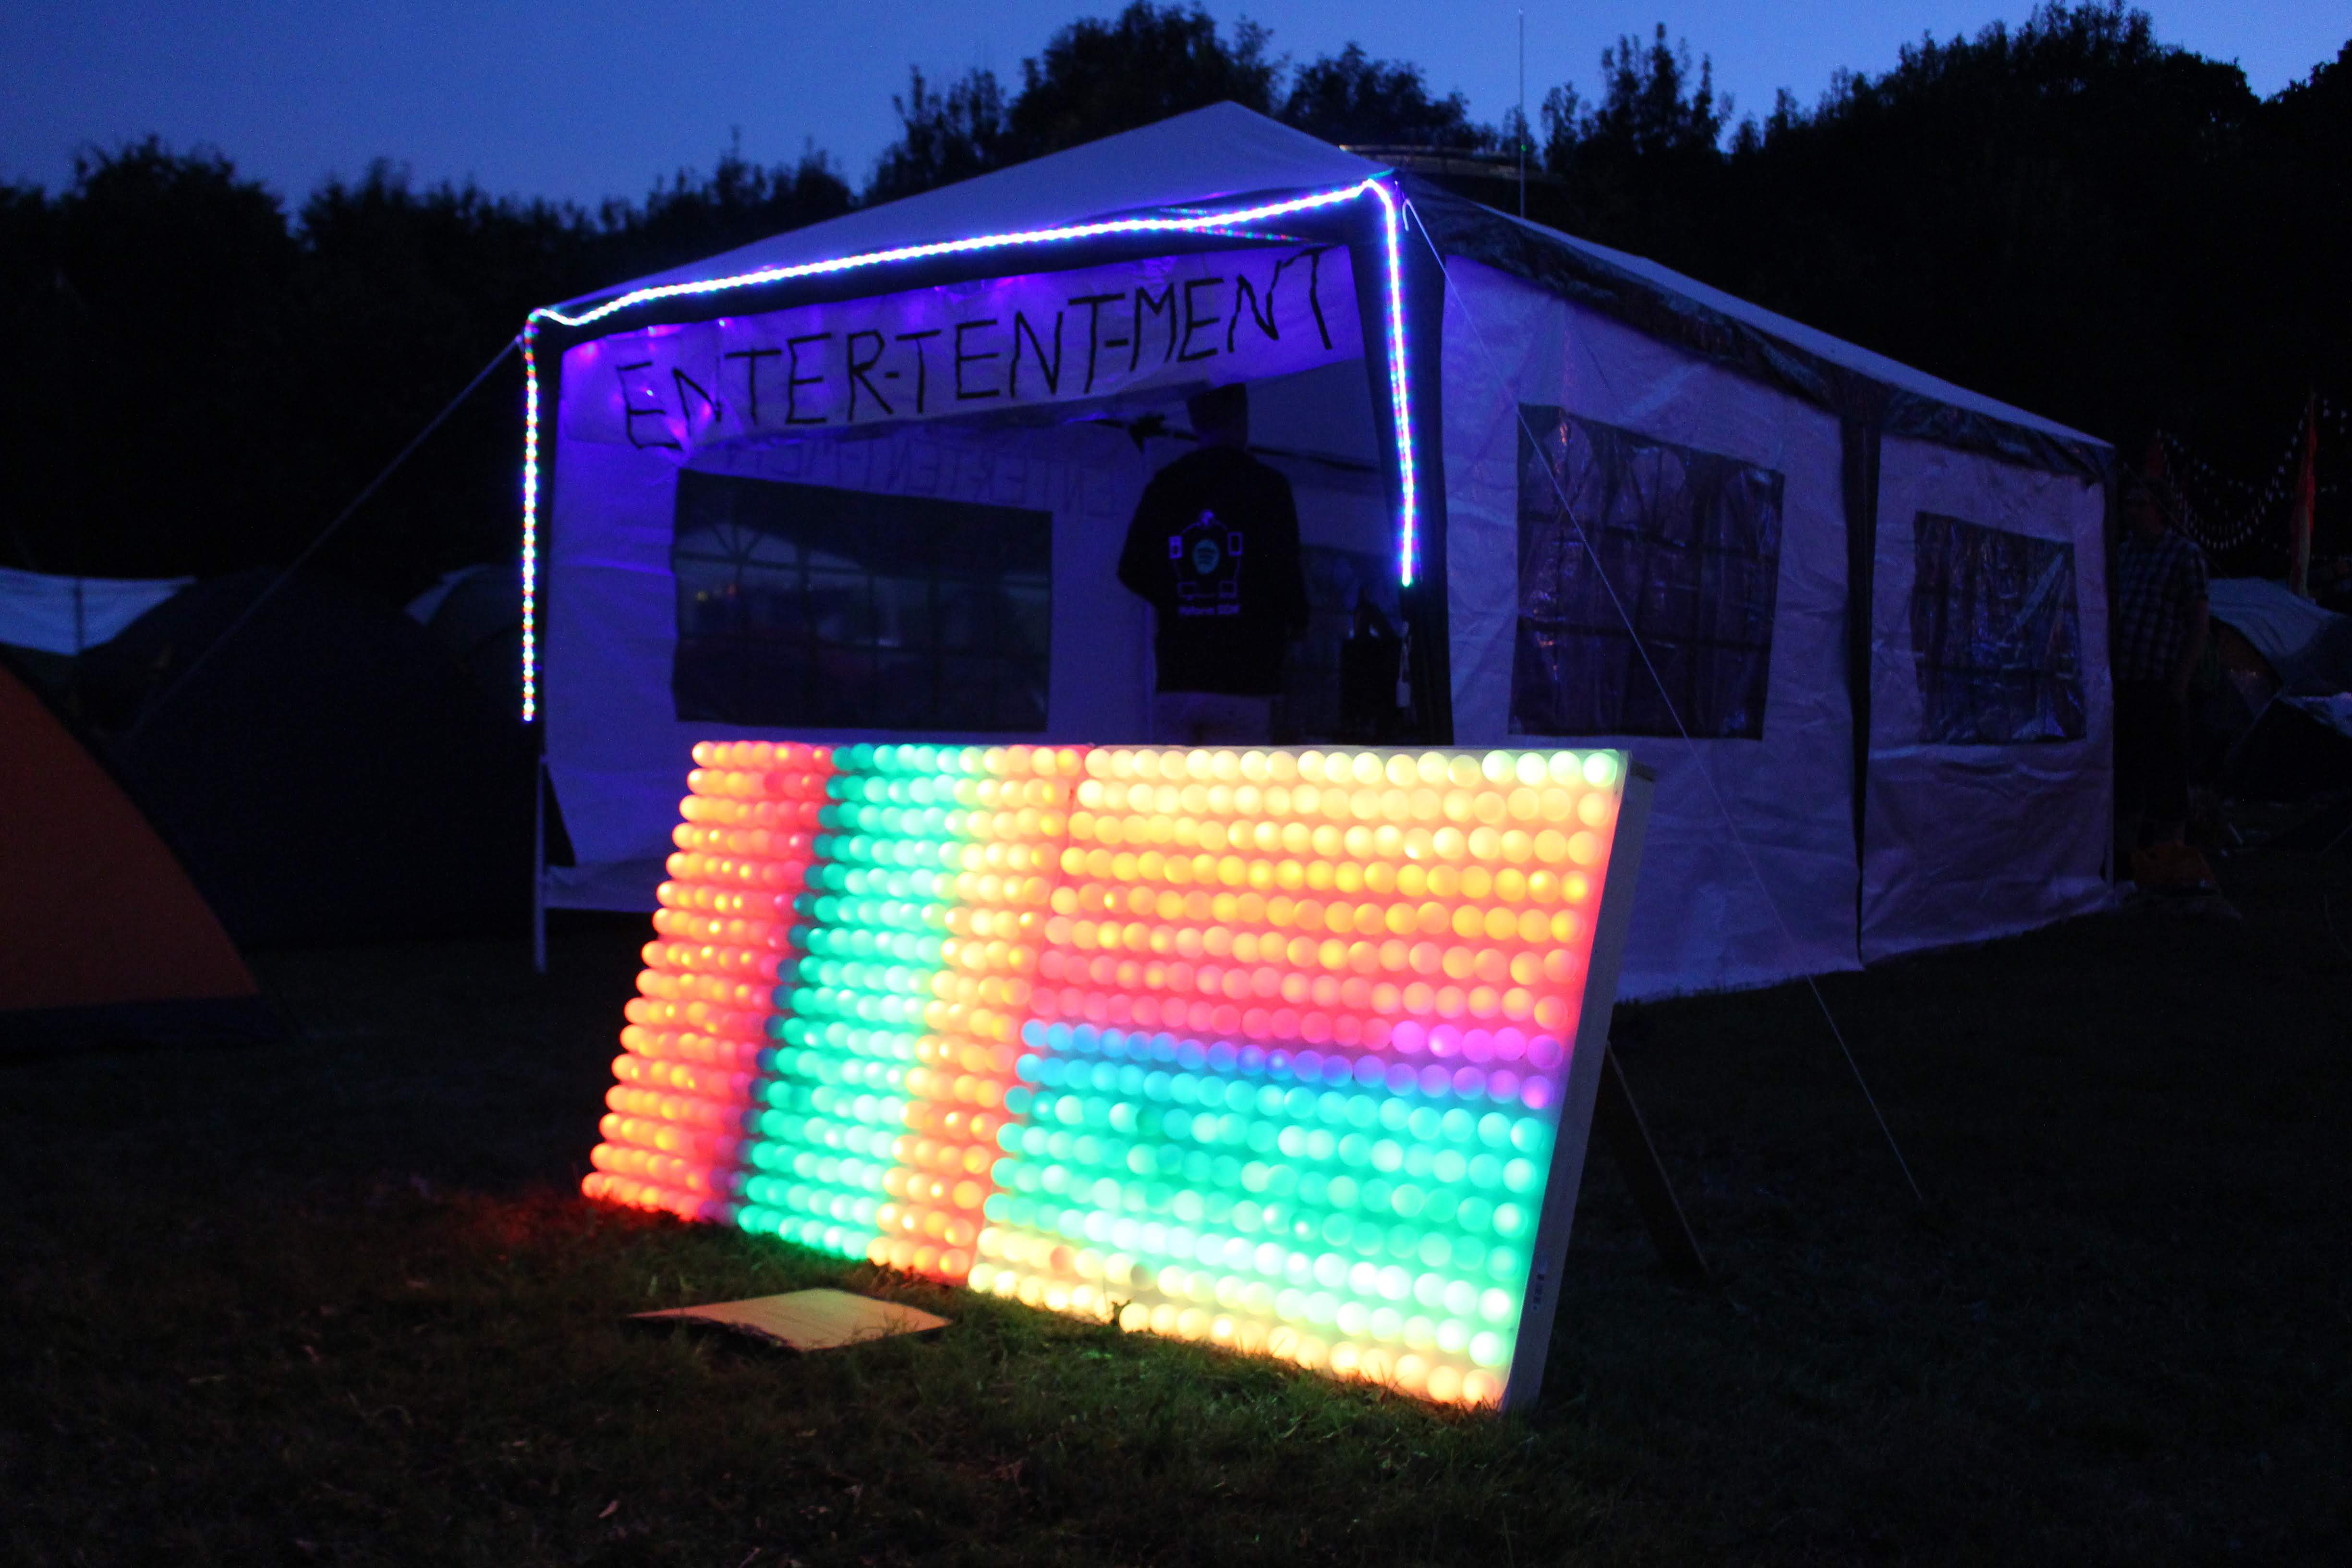
We hooked everything up and ran some basic Neopixel rainbow tests through a NodeMCU and it looked absolutely beautiful! The LEDs were perfectly diffused by the ping-pong balls which did a great job of displaying colours in a really nice elegant way. It looked super super nice.
Things were looking good so we decided to leave it there and pick it back up at the festival where we’d combine both halves together to make the full 32x18 display. Just like every project, testing things at home in a safe environment means it’ll work in the wild for sure.. right?
No wait, it’s entirely broken!
 We arrived at the festival and everything seemed to function until we tried running more complex animations on the display and the display would just go wild with colours. It really looked like there was some kind of noise or interference with the data connection. What’s interesting is that we could run a simple colorWipe command through the Neopixel library and it would get about 200-ish LEDs in before the entire grid would lose control and become all fuzzy. Our first thought was that the NodeMCU wasn’t capable of driving so much data through a single port so we swapped it out for a regular Arduino Uno which also seemed to have the exact same issue. We also spent a LOT of hours rewiring every 5V & GROUND connection to each strip trying to make sure nothing was missed and no cables were wrongly crossed.
Things eventually became a lot more difficult to work on as night fell and we were trying to use a soldering iron while sitting in the grass at a dimly lit festival during the build-up process so we decided to call it quits and just roll with that we had. To our surprise everyone still seemed to love it! People were so taken aback by how beautiful it looked that no-one seemed to question what it was actually displaying. In-fact people just assumed it was some kind of data visualisation so we ended up satirically calling it a “Hard Disk Defrag Visualiser” and everyone who came by legitimately thought that’s exactly what it was doing. Little did they know it was just our broken LED matrix displaying random values on each LED because we we never figured out how to fix it!
So what went wrong?
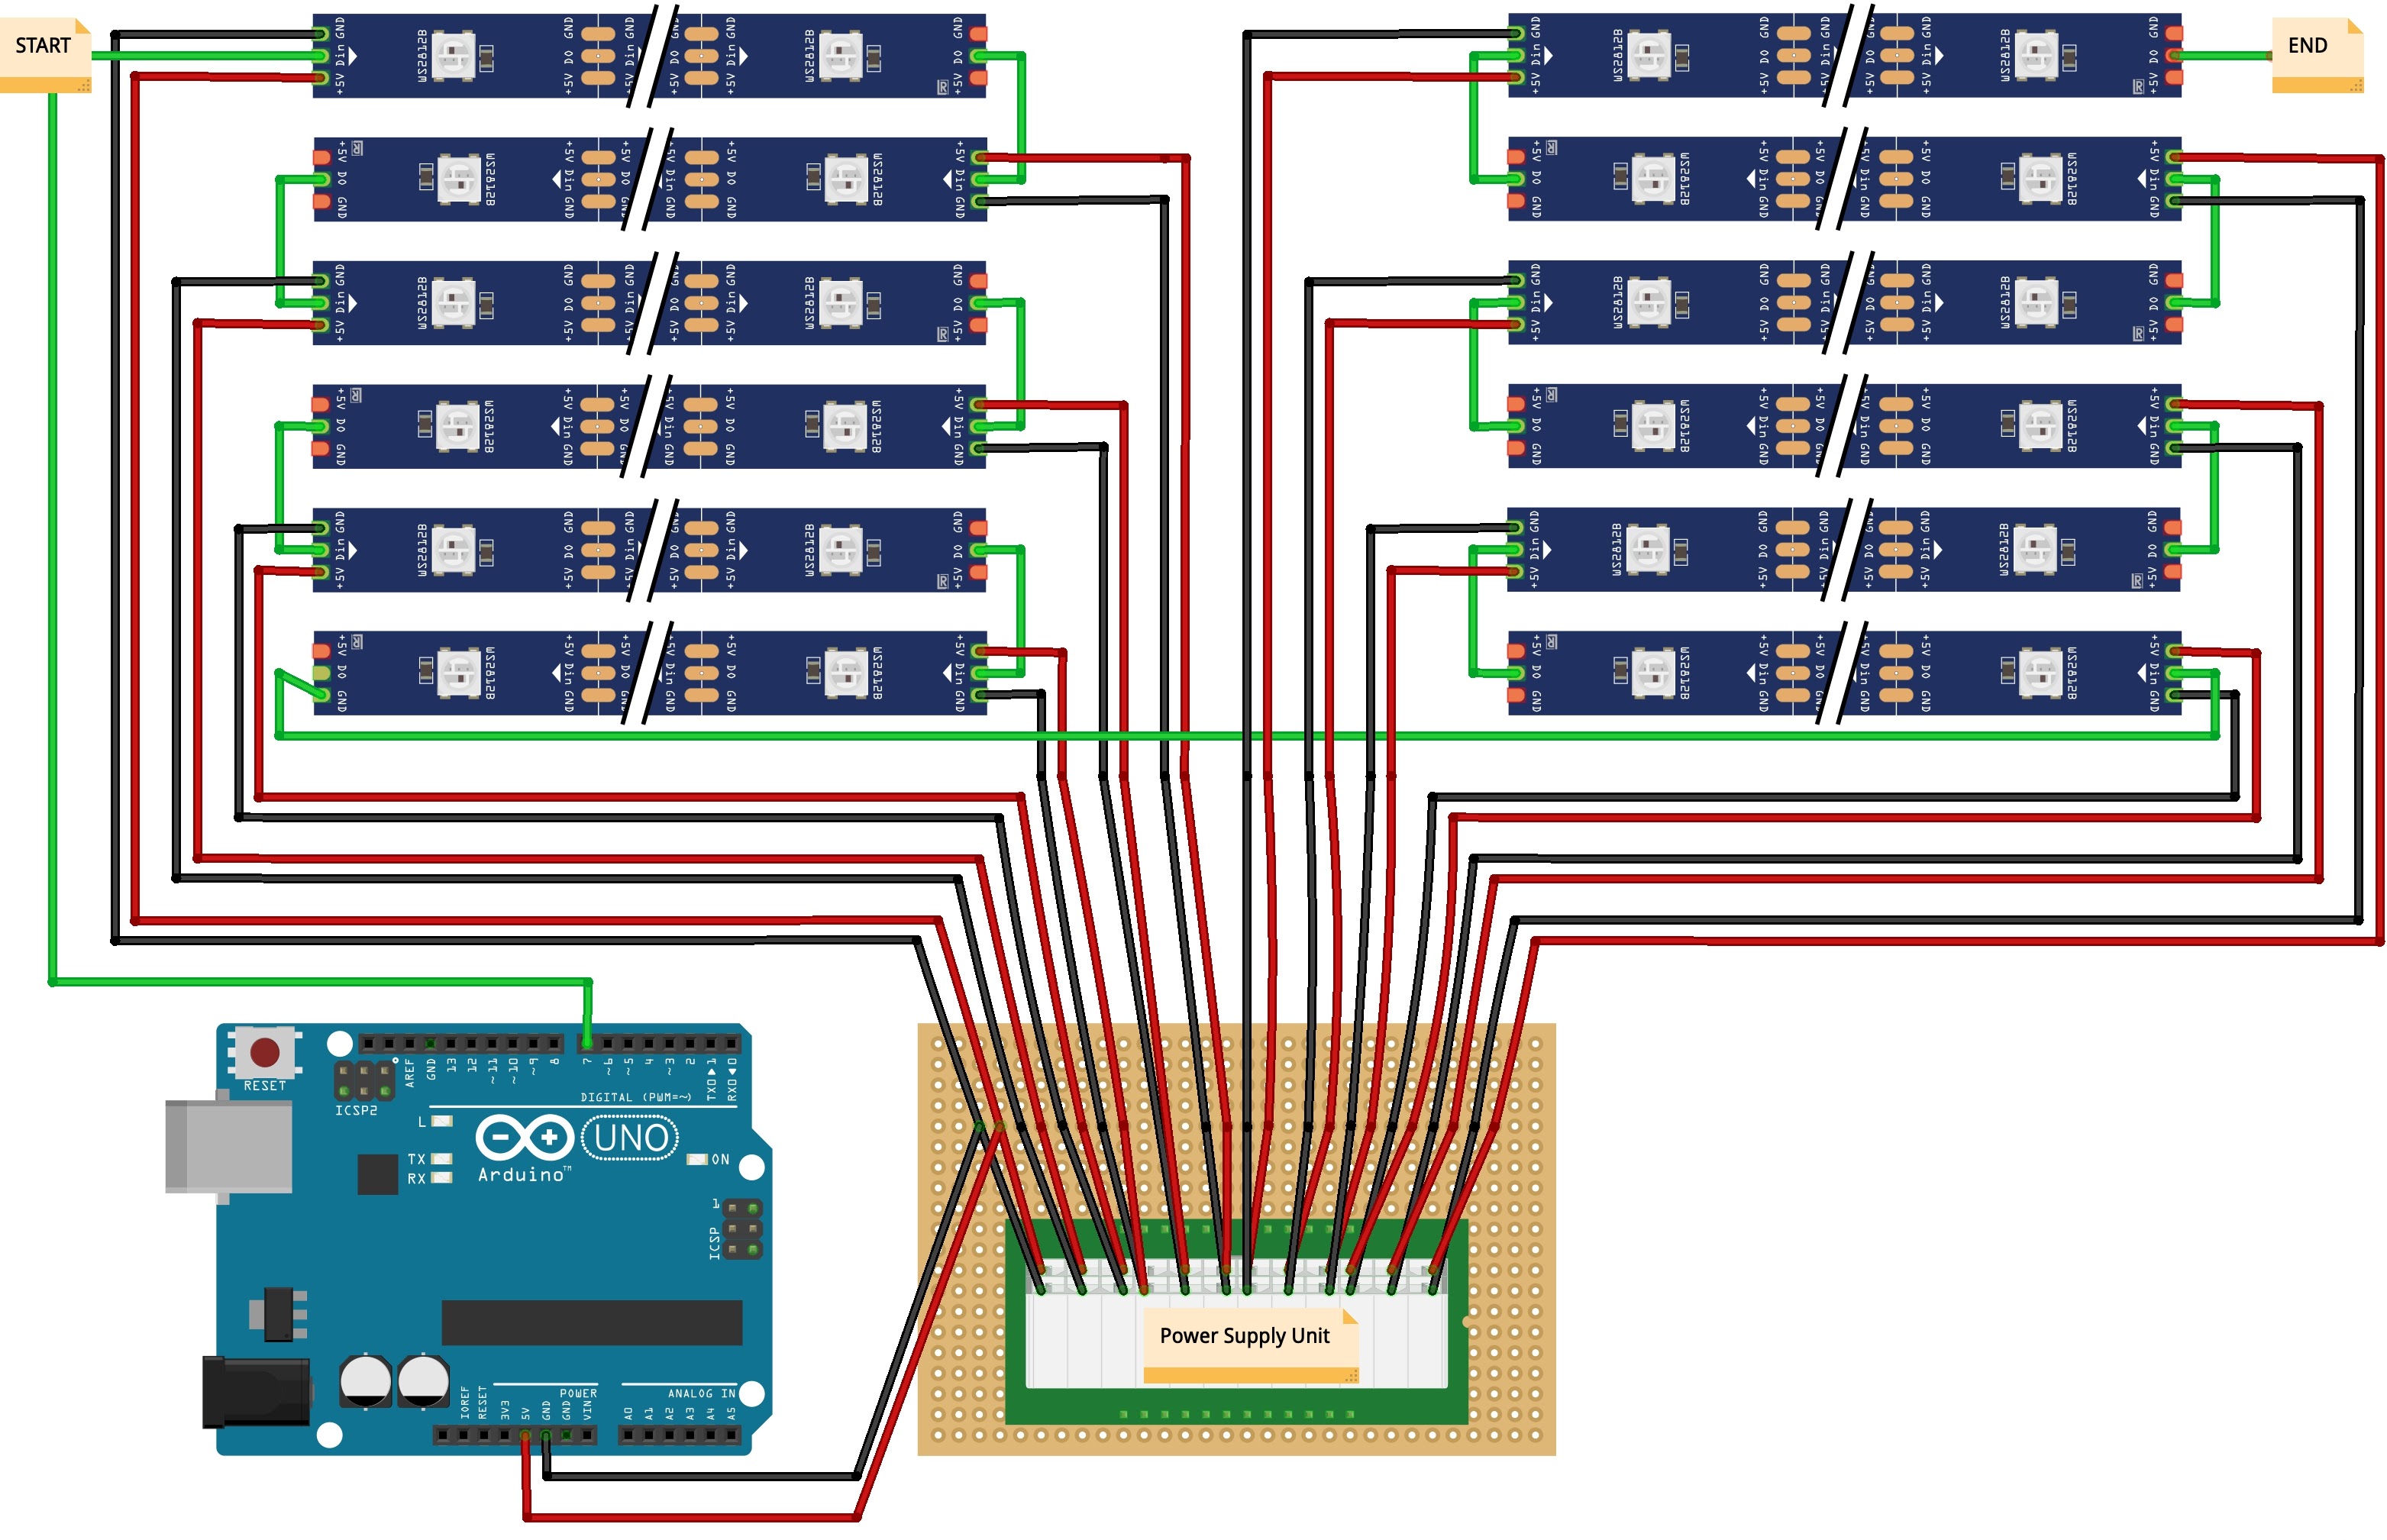 What went wrong is pretty straight forward. We got everything perfectly configured apart from that single green cable which runs through every LED strip. As each LED strip was nearly 4 meters long and we had 12x strips all daisy changed there’s no way the data cable was able to transmit the signal along all 48 meters. That explains why it would work perfectly for the first few strips however once it exceeded about 200 LEDs the entire grid would start lagging and displaying random values. Usually this wouldn’t be an issue if you had higher quality official Neopixel strips however as I was using cheaper LEDs as well as having about 5cm of spacing between each light, it really made the total distance we were sending a signal through much longer through low quality cables.
As it turns out there’s a simple solution to this problem. Either adding a new data cable to the Arduino every few strips or purchasing a specialised LED strip driver which solves this exact problem like the FadeCandy by Adafruit.
Conclusion
 Setting aside the issues around not being able to fully program the matrix to display what we wanted this was still a super fun project to work on! There’s something really enjoyable about building a large physical installation for a festival and sharing your creations with others who really take time to appreciate what you’ve built. There’s also something therapeutic about drilling 576 holes in a wooden board, carefully cutting an X onto a ping-pong ball and then feeling an LED into it piece-by-piece. The end result was also really pretty to look at, especially outdoors at night and it really came out much better than we originally imagined. At some point in the future I’ll likely take out the LEDs strips again and get all 48 meters of it to correctly work!