
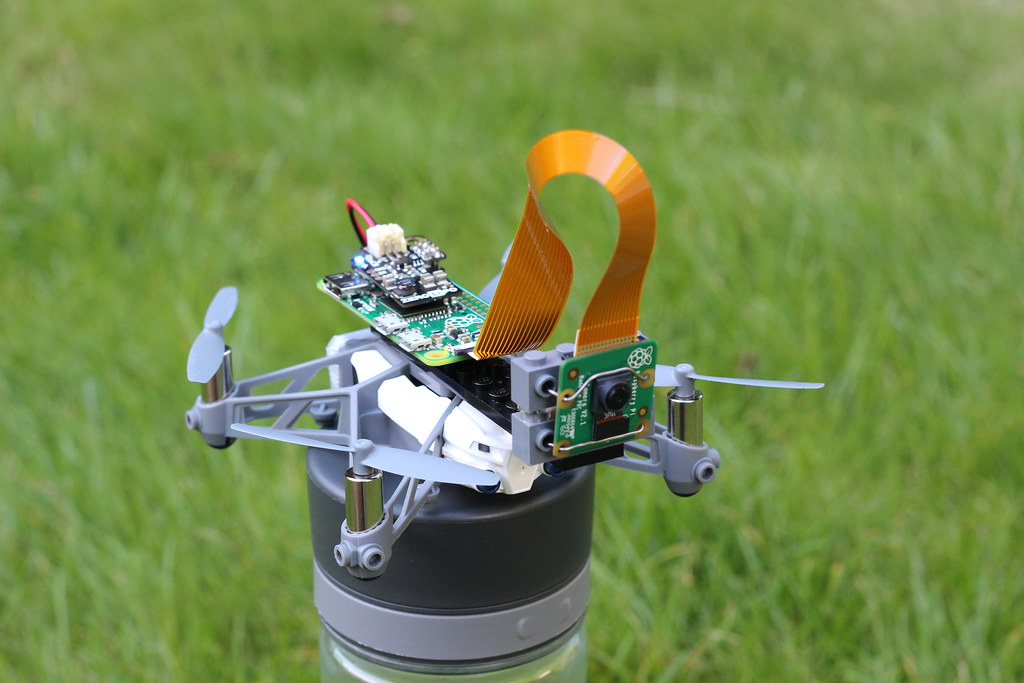
Attaching a Raspberry Pi camera to a drone
Recently I got a Parrot MiniDrone which is a really great piece of kit. The drone already comes with a built in down-facing camera however i’ve been looking for an excuse to do a Raspberry Pi Zero camera project for a while now, so I thought this would be a great chance to put to 2 together. The project was a lot harder than I expected due to the very tight weight limit the drone could hold while still flying stable. This specific version of Parrot MiniDrone has a lego adapter on top which allows you to add up to 30 grams of lego bricks for fun. The goal was to attach a camera on top which would record video from an FPV perspective. Here’s how it went…
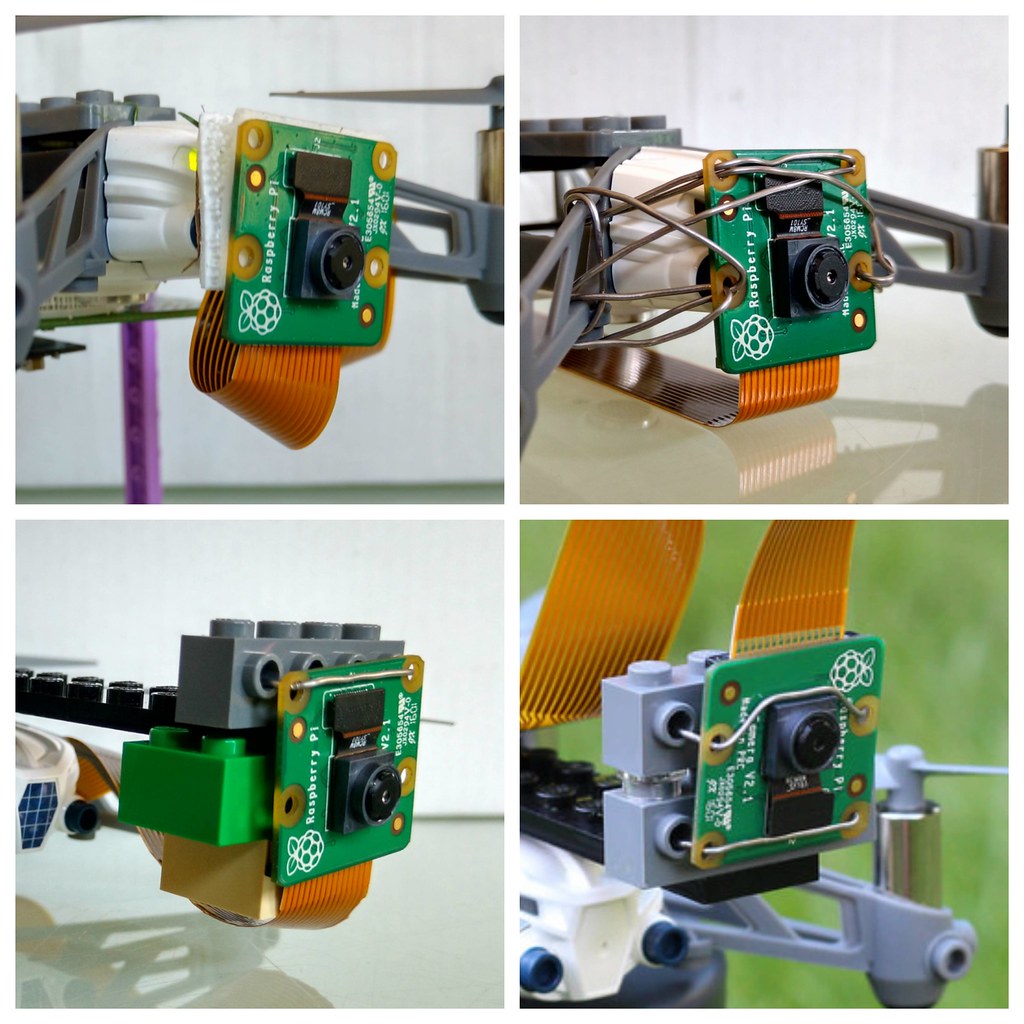
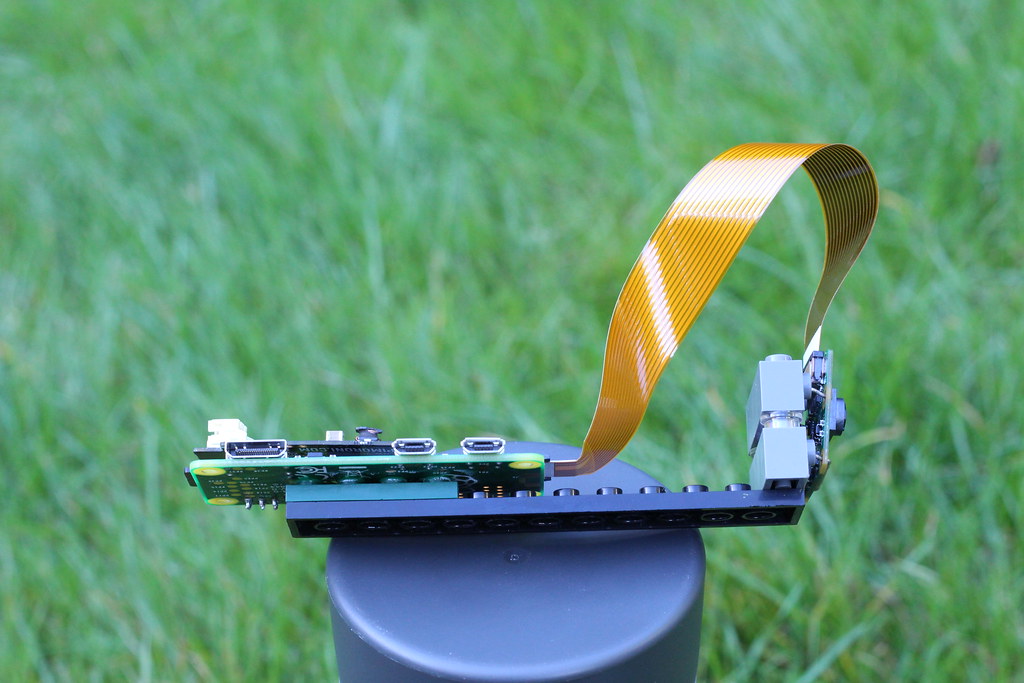
Mounting the camera module
I went through a LOT of iterations when trying to find the best way to mount the camera. The main issue was finding a light weight solution to sturdily attach it while having the cable attached to the Rasberry Pi without blocking the sensor on the bottom of the drone. The end solution ended up using some lego pieces with soldering wire holding the camera in position.
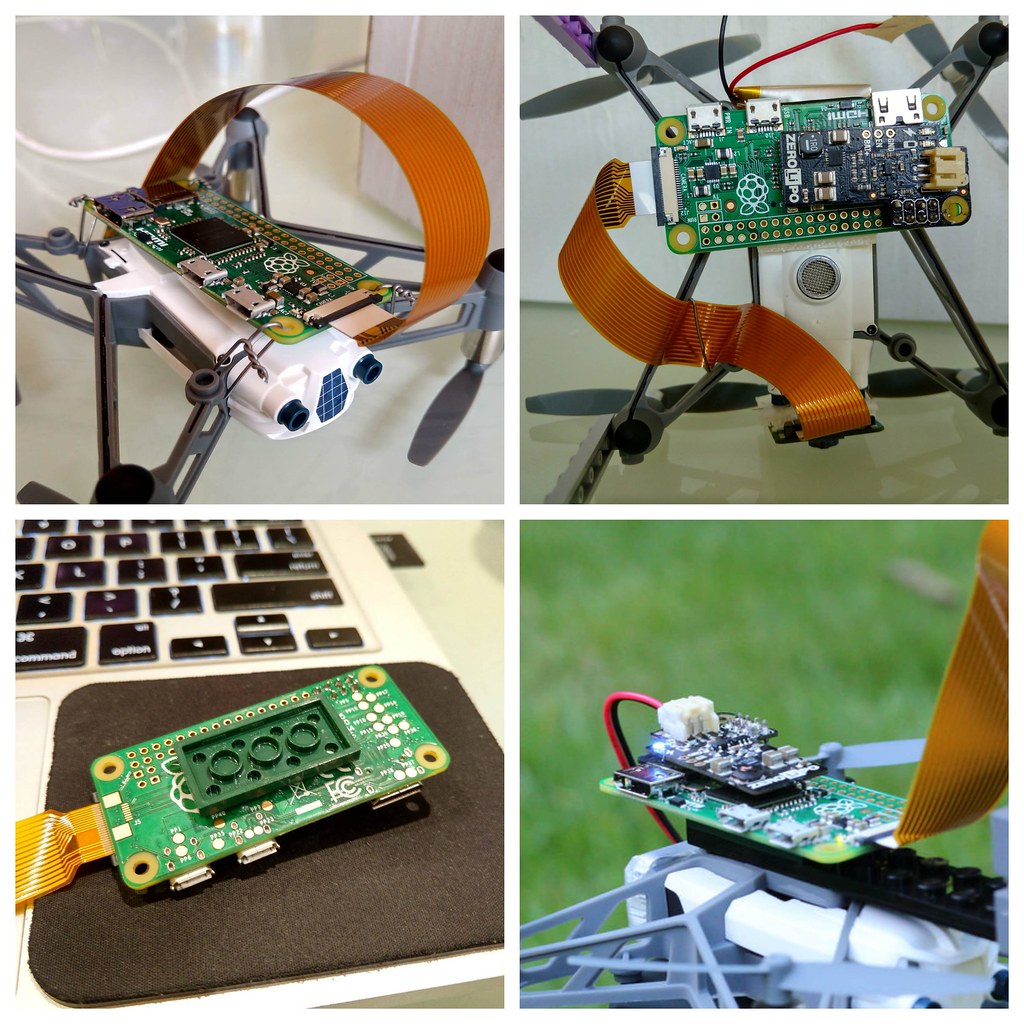
Positioning the Raspberry Pi
Positioning the Raspberry Pi took a very long time to get right as this seemed to be the deciding factor on weather the drone could successfully fly without losing balance. The issue was that it had to be center balanced as well as accessible to the camera module cable and lipo battery. I ended up supergluing a piece of lego to the bottom of the Pi and attaching it on-top of the drone.
Powering everything
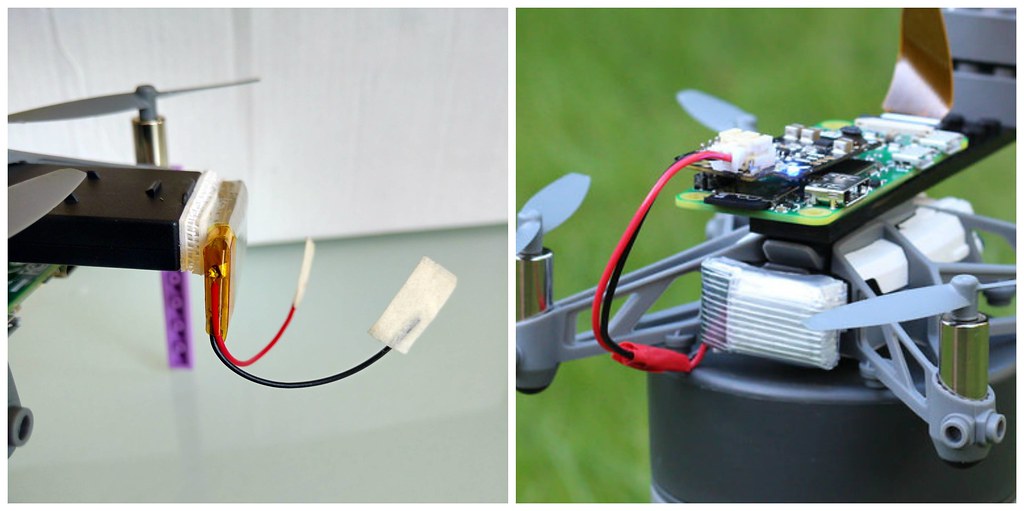
Powering the Raspberry Pi was pretty straight forward thanks to the Zero LiPo which worked out great! This was the first time i’ve powered anything with lipo batteries and there were a few iterations of figuring out where to attach it and which batteries I could use to not add too much weight to the drone. I ended up using velcro to attach the lipo battery to the main drone battery so I could easily swap out the lipo battery with replacements. I ended up using some cheap 150mAh 20C lipo batteries which I soldered connectors to which lasted about 30mins when continuously recording video.
The final build
Like most projects, the simplest and most elegant solutions seem to take the longest to achieve however are completely worth it. The final solution was to use a single long piece of lego to attach the Pi and camera module to and have a simple power cable leading to the lipo battery on the back. It worked great and a nice unintended benefit of having all the electronics attached to that single piece of lego was that when the drone would crash, the lego would shatter and break gracefully, thereby protecting the electronics by not applying any pressure to them. If this wasn’t the case, crashing the drone would potentially damage the Pi or camera module, which is a lot worse than simply breaking some lego. An issue which was never solved and probably wouldn’t be possible, was the issue with accidentally cutting the camera module cable with the drone blades. I ended up breaking about 3-4 over the 2 weeks I worked on this in my spare time.
Programming the Pi
The code I ran on the Rasberry Pi was very dumb. All I wanted it to do was continuously record video while powered, however when killing the device, the video would corrupt, so I wrote a simple python script to continuously take 10 second videos. This way if I killed the device, worse-case I would lose 10 seconds worth of flight video, which isn’t terrible at all. For this project, I was a lot more interested in the hardware, so I even lazily recorded all video straight into the Pis limited home directory and USB FTP’ed the videos onto my laptop to process after each flight. You can see the code here.
The final result
The final result came out pretty great! What really surprised me was the framerate in which the Raspberry Pi camera module could record video in. I was also impressed with how well the drone could handle the extra weight of all the electronics which ended up weighing just over 35 grams.