
Building a micro:bit gesture controlled lamp
![]() Recently I attended the hacker camp Chaos Communication Camp which really got me motivated to get creative again with building side projects and specifically ones which GLOW because what’s the point of a hardware project if it doesn’t glow? I decided on building myself a lamp using the BBC micro:bit as it’s this super simple microcontroller made for children and comes jam packed with a bunch of sensors and best of all - can be programmed using MicroPython.
Recently I attended the hacker camp Chaos Communication Camp which really got me motivated to get creative again with building side projects and specifically ones which GLOW because what’s the point of a hardware project if it doesn’t glow? I decided on building myself a lamp using the BBC micro:bit as it’s this super simple microcontroller made for children and comes jam packed with a bunch of sensors and best of all - can be programmed using MicroPython.
Hardware
- 1x BBC micro:bit used for super simple gesture controls. The programming of the micro:bit is unbelievably simple and has a whole bunch of sensors built in for future upgrades I could possibly make to this project.
- 1x ATMEGA328 5V 16MHz Arduino (basically a knockoff Arduino Pro Mini) used for controlling the neopixels as the micro:bit cannot run regular Arduino code with third party libraries so a simple arduino was needed to act as an interface between the micro:bit and Neopixels.
- 8x NeoPixel Sticks & 1x NeoPixel Ring for providing super high quality LEDs to the project. It’s worth noting that I started off using a knockoff NeoPixel Ring on the top and noticed a pretty big difference in the quality to the official Adafruit Pixel Sticks. I’d really recommend sticking to the official Adafruit LEDs for this project, it’s worth it!
- 1x 3D printed lamp from Thingiverse.
Building the main light bulb
![]() Soldering the main light bulb together took SO MANY attempts to get right. The main issue was that the bulb would be made of 4x columns of LEDs however each column itself was built of 2x NeoPixel Sticks which meant I had to figure out a way of securely joining them together without them snapping in the middle. I eventually figured out that cutting the tips off some old header pins and using those to then solder both ends of the Neopixels together did the trick. I then daisy chained each strip together to act as a single addressable led strip rather than 9x individual components which made things significantly easier when it came to mounting the bulb to the base and driving the LEDs with an arduino.
Soldering the main light bulb together took SO MANY attempts to get right. The main issue was that the bulb would be made of 4x columns of LEDs however each column itself was built of 2x NeoPixel Sticks which meant I had to figure out a way of securely joining them together without them snapping in the middle. I eventually figured out that cutting the tips off some old header pins and using those to then solder both ends of the Neopixels together did the trick. I then daisy chained each strip together to act as a single addressable led strip rather than 9x individual components which made things significantly easier when it came to mounting the bulb to the base and driving the LEDs with an arduino.
It’s pretty clear some serious macgyvering was used to connect each strip when daisy chaining the tops and bottoms of bulb together, especially when adding in the Neopixel Ring on the top. The cabling worked out a little funky with 2x Neopixel Sticks going up one side which then connected to the Neopixel Ring at the top which then connected to the remaining 6x Neopixel Sticks grouped into 2x panels to make up the remaining 3x columns.
In the end the structure was super secure and I was very happy with the end result, it does look horribly hacked together however I plan on simply sealing up all the electronics using hot glue to make it a little shock proof from tips and falls.
Macgyvering the base together
 Building the base was by far the most time consuming part of the project. This was also the first time I’ve really got my hands dirty wiring up small circuit boards and sharing power between multiple microcontrollers, so it was a lot of fun learning! What’s going on here is that the micro:bit controller is talking via serial (just RX) to the Arduino to tell it when gestures are fired, the Arduino then instructs the Neopixels accordingly.
Thanks to the use of sandwiching all the cabling between copper PCB boards and using header pins as load bearing columns the structure ended up being super stable and secure. I also added a fine layer of white foam paper between each board to avoid contacts wrongly touching while giving it something to pass heat off to when the microcontrollers become warm.
Circuit Diagram
![]() Here’s a diagram showing how the entire thing is wired together. It seems pretty complex due to the funky daisy chaining going on between the NeoPixel Sticks where they zigzag up and down the bulb which cause every-other stick to be inverted. This was totally worth it though as it allowed the entire bulb to be driven by a single input pin on the Arduino which interacted with all LEDs as if they were part of a single LED strip.
Here’s a diagram showing how the entire thing is wired together. It seems pretty complex due to the funky daisy chaining going on between the NeoPixel Sticks where they zigzag up and down the bulb which cause every-other stick to be inverted. This was totally worth it though as it allowed the entire bulb to be driven by a single input pin on the Arduino which interacted with all LEDs as if they were part of a single LED strip.
3D printing the body
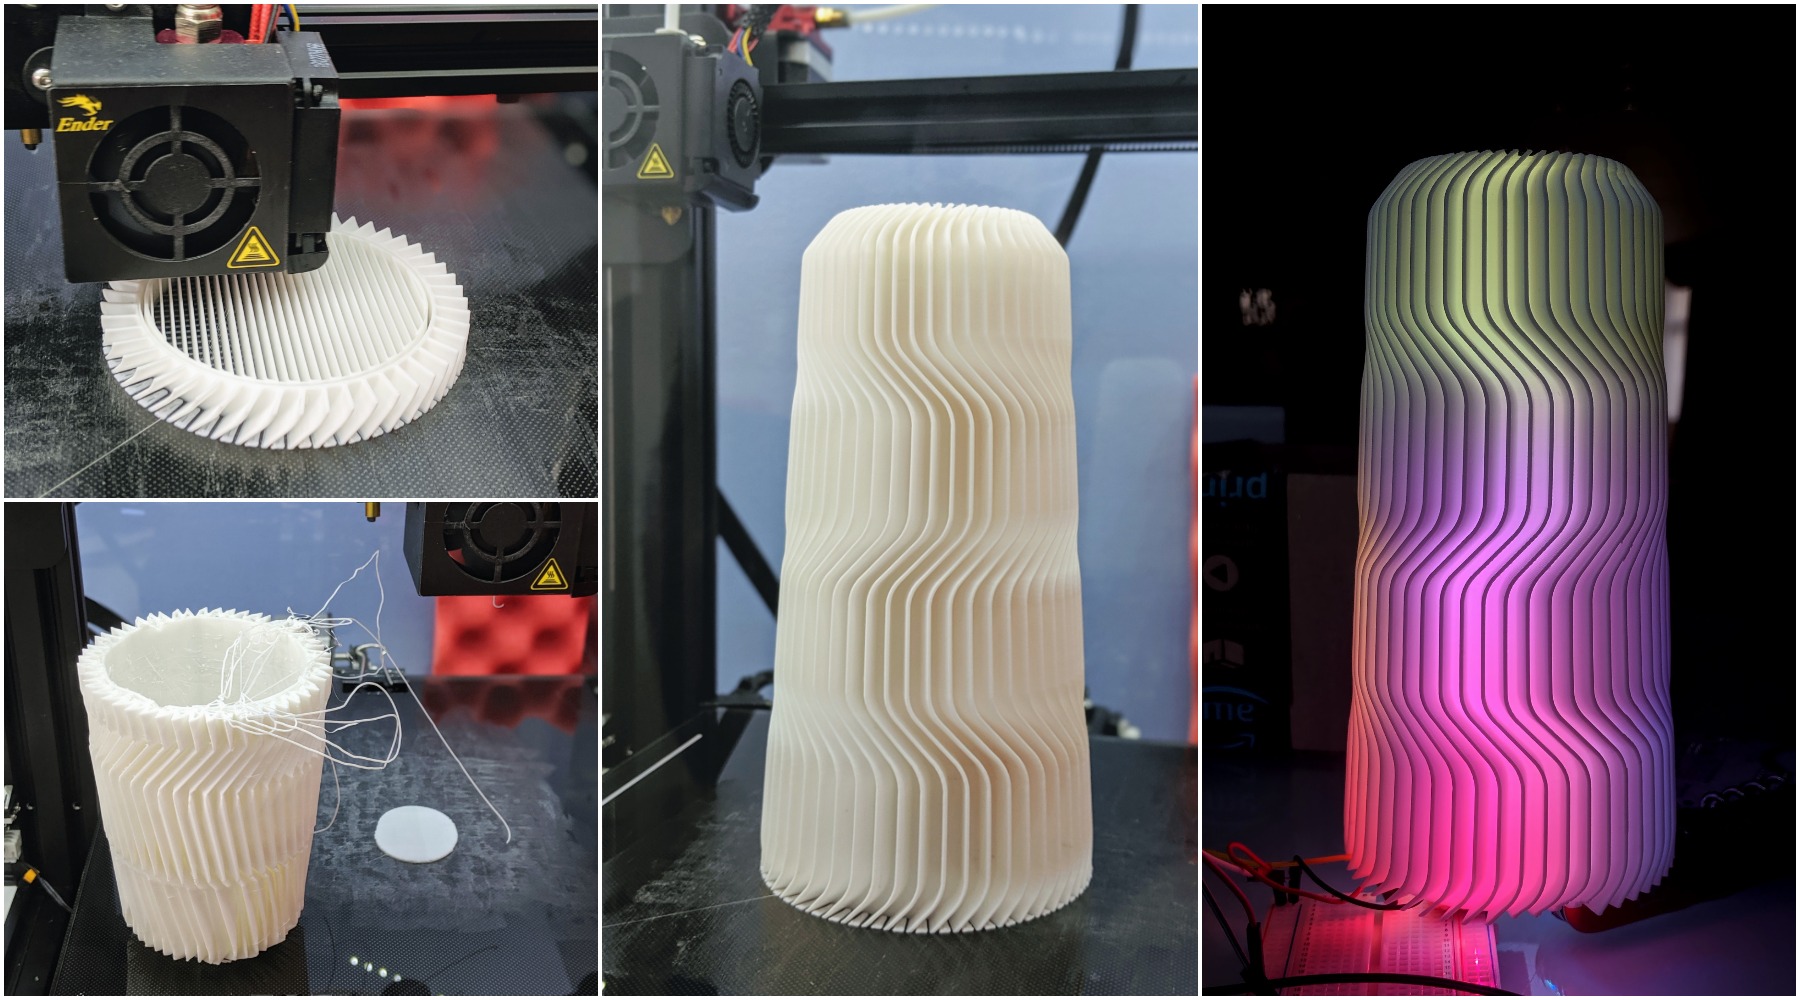 On Thingiverse I found this absolutely beautiful lamp made by brico3d which diffuses the light of LEDs perfectly. It took a whole 20hrs to get the final shell printed to a high enough quality but it was totally worth it. I’ve pinged brico3d €20 for this great design too because it’s by far the best lamp or vase design on Thingiverse.
Finishing off the hardware
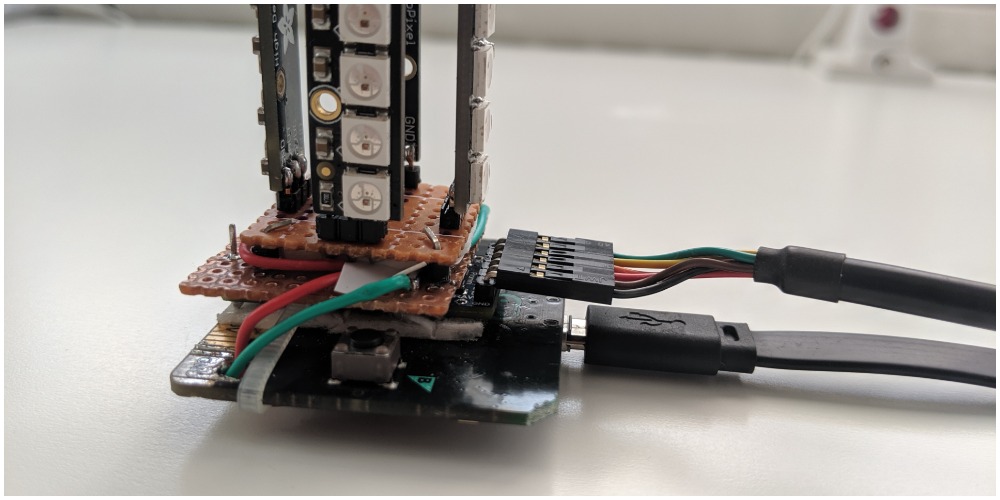 Before sealing the electronics into the 3D printed case I made sure that both the micro:bit could still be programmed via USB and the Arduino too via FTDI so that I could make future upgrades easily. The Arduino’s FTDI input also allowed me to easily power the lamp via two header cables.
![]() I also superglued Lego to the base of the lamp and to the micro:bit so that I could maintain a modular design and make changes in the future easily by snapping the electronics on/off the lamp. I also recycled an old USB cable and passed it through the hole of the base which gave the final product a really professional look.
I also superglued Lego to the base of the lamp and to the micro:bit so that I could maintain a modular design and make changes in the future easily by snapping the electronics on/off the lamp. I also recycled an old USB cable and passed it through the hole of the base which gave the final product a really professional look.
Software
Put simply - the micro:bit is seriously cool. It has a bunch of sensors built in and supports MicroPython, Javascript and regular old Arduino C as languages to control it with. The Micropy API also has a bunch of common libraries built in for working on common projects such as Neopixels which would have worked great however I was having some latency issues with controlling my strip as well as the library being a little too simplistic for my needs. I ended up adding an Arduino in the middle to do the Neopixel heavy lifting while using the micro:bit for detecting the gestures.
Using the micro:bit to detect gestures and send information via the RX serial connector is quite simple:
from microbit import *

uart.init(baudrate=9600, tx = pin0, rx = pin1)

while True:
    if accelerometer.was_gesture("shake"):
        uart.write("1")
        sleep(2000)
The Arduino then picks up on incoming serial information and flips a binary switch deciding on whether to switch the Neopixels on or not. It’s really that simple at the moment. I plan on adding a bunch more logic for having configurable settings which allow the lamp to have multiple lighting modes such as fireplace, rainbow, white etc. You can find all the code for this project here.
The final result
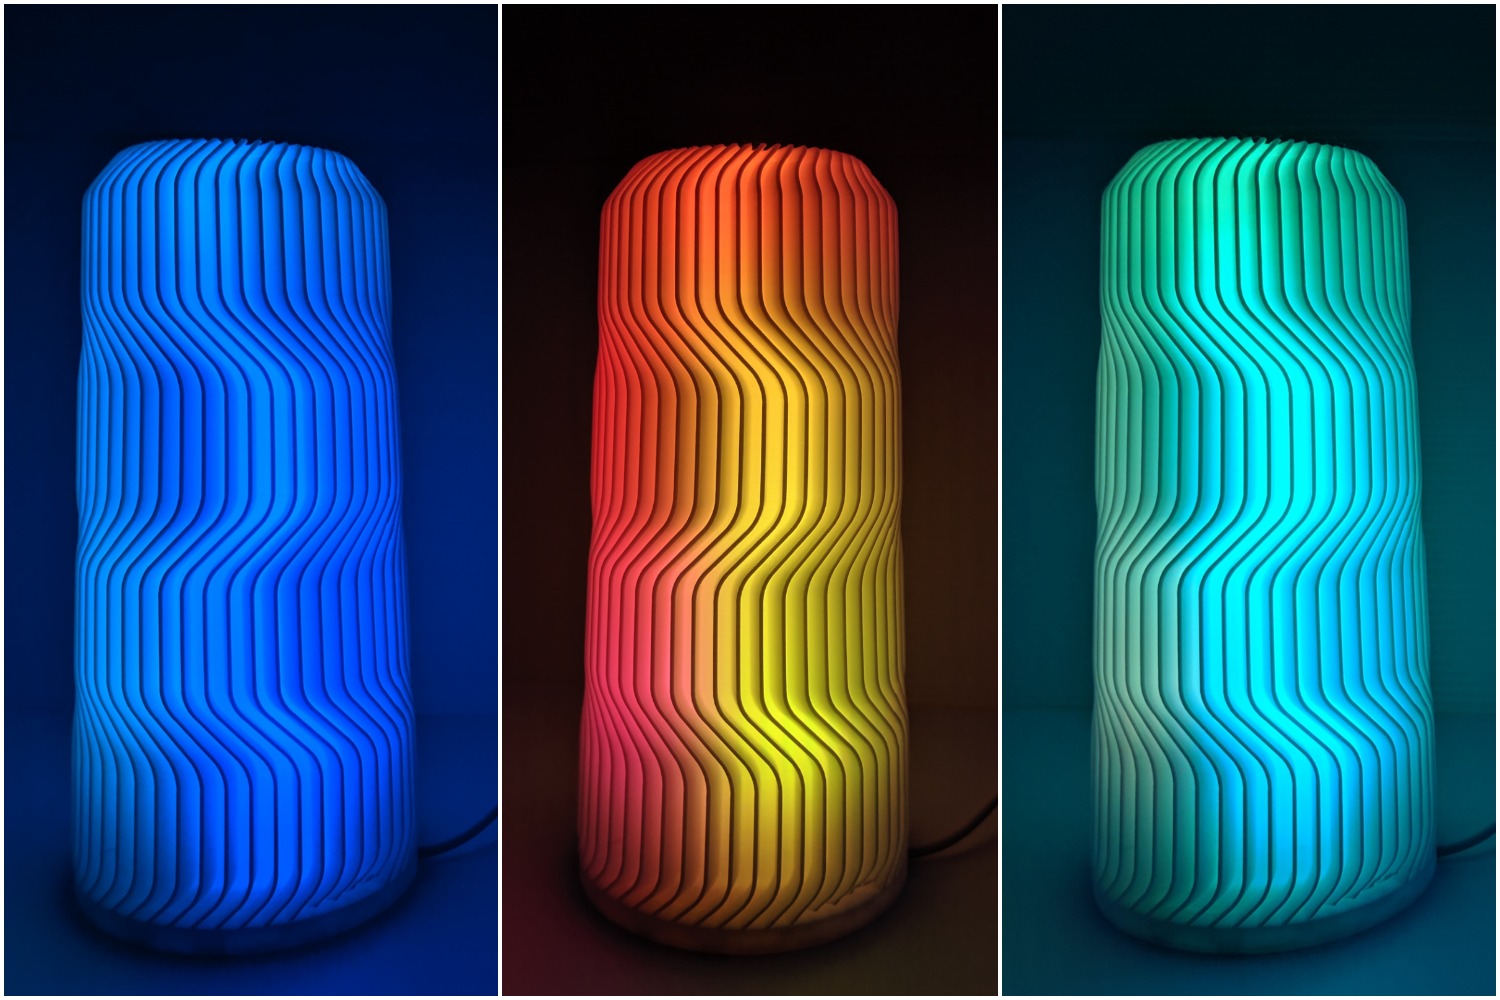 The final product ended up looking awesome! The colours are super bright and vivid and the shell of the lamp really diffuses the Neopixels perfectly. I started off by testing a sample rainbowCycle test from Neopixel library which works great at showing it off.
![]() The shake gesture to turn the lamp/on worked out fantastically too thanks to the BBC micro:bit, I still can’t believe it only takes a few lines of code now to implement gestures into Arduino projects now!
The shake gesture to turn the lamp/on worked out fantastically too thanks to the BBC micro:bit, I still can’t believe it only takes a few lines of code now to implement gestures into Arduino projects now!
![]() I also managed to find a nice Arduino sketch for imitating a flickering candle allowing the lamp to be used for subtle mood lighting. It’s a little hard to see on video but it gives my entire bedroom a nice warm glow.
I also managed to find a nice Arduino sketch for imitating a flickering candle allowing the lamp to be used for subtle mood lighting. It’s a little hard to see on video but it gives my entire bedroom a nice warm glow.