
Building an Air Conditioning unit out of Lego
 Like most people, this year I’ve been spending a lot of time indoors. The only catch is that it’s London summertime and no one has air conditioning in their homes. It’s been getting as high as 35° recently and I thought I’d try making myself a cheap air conditioning system to help me out. This project turned out to be pretty easy for once, and a lot of fun!
Hardware
- 1x 2M Soft Copper Tube Copper Pipe cut into 4x 50cm straight copper pipes used to transfer the temperature from the water to the air
- 4x Antec 120mm Case Fans For pushing room temperature air through the cold copper pipes
- 4x Micro Submersible Mini Water Pumps used to pump water through 4x channels of water tubes and through the copper pipes.
- 1x 400cm PVC Soft Water Pipe split into 8 equal pieces each 50m long and used to transfer water from the tank to the copper pipes and back to the tank again.
- 1x 4-Channel 5V Relay Module used to power the motors via an external power supply while being controlled by the Arduino.
- A LOT of white Lego bricks
How it works
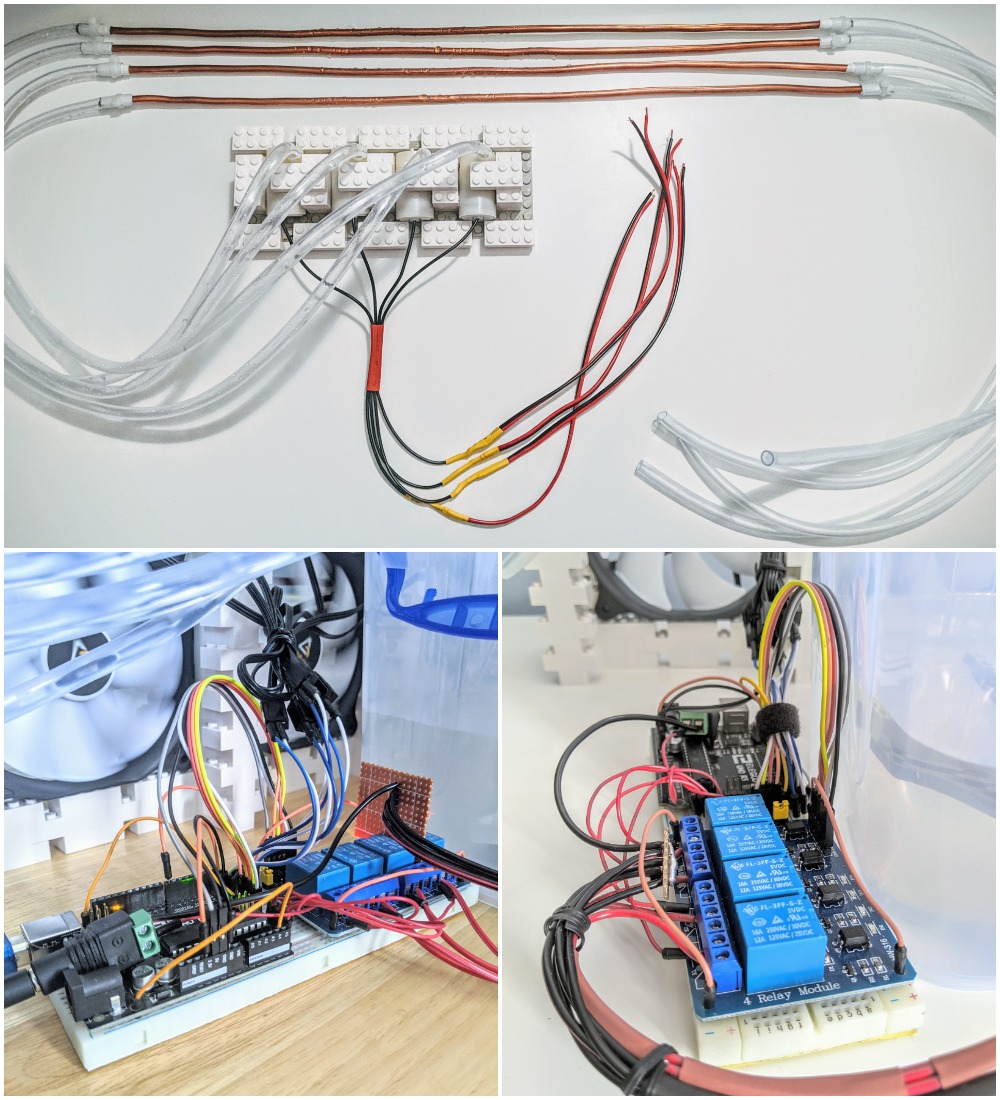 The electronics isn’t super complex, there’s just a lot of cabling going on! The way it works is that all 4x water pumps are held together by a Lego base I made which is then entirely submerged in a bucket of water. Each pump sucks in water and pumps it through the pipe which feeds the water through the copper pipes (thereby transferring the cold temperature to it) before looping back into the bucket of water where it’s mixed back with the original water source. The cooling happens manually by placing ice packs into the bucket to cool the water.
There technically isn’t any water cooling going on here. It’s just a system which pumps water in a loop between a bucket and copper pipes. As the copper rods cool, the fans push room temperature air through them which cool the air and act as air conditioning.
There’s also a 4-channel 5v relay to help add an external power source as the arduino isn’t powerful enough to power all 4x water pumps. It’s also worth noting that this project could be achieved via just one motor, one relay and a single channel of water instead of 4x however you’d need a much more powerful motor and probably a larger copper pipe to push enough water through.
Building the body
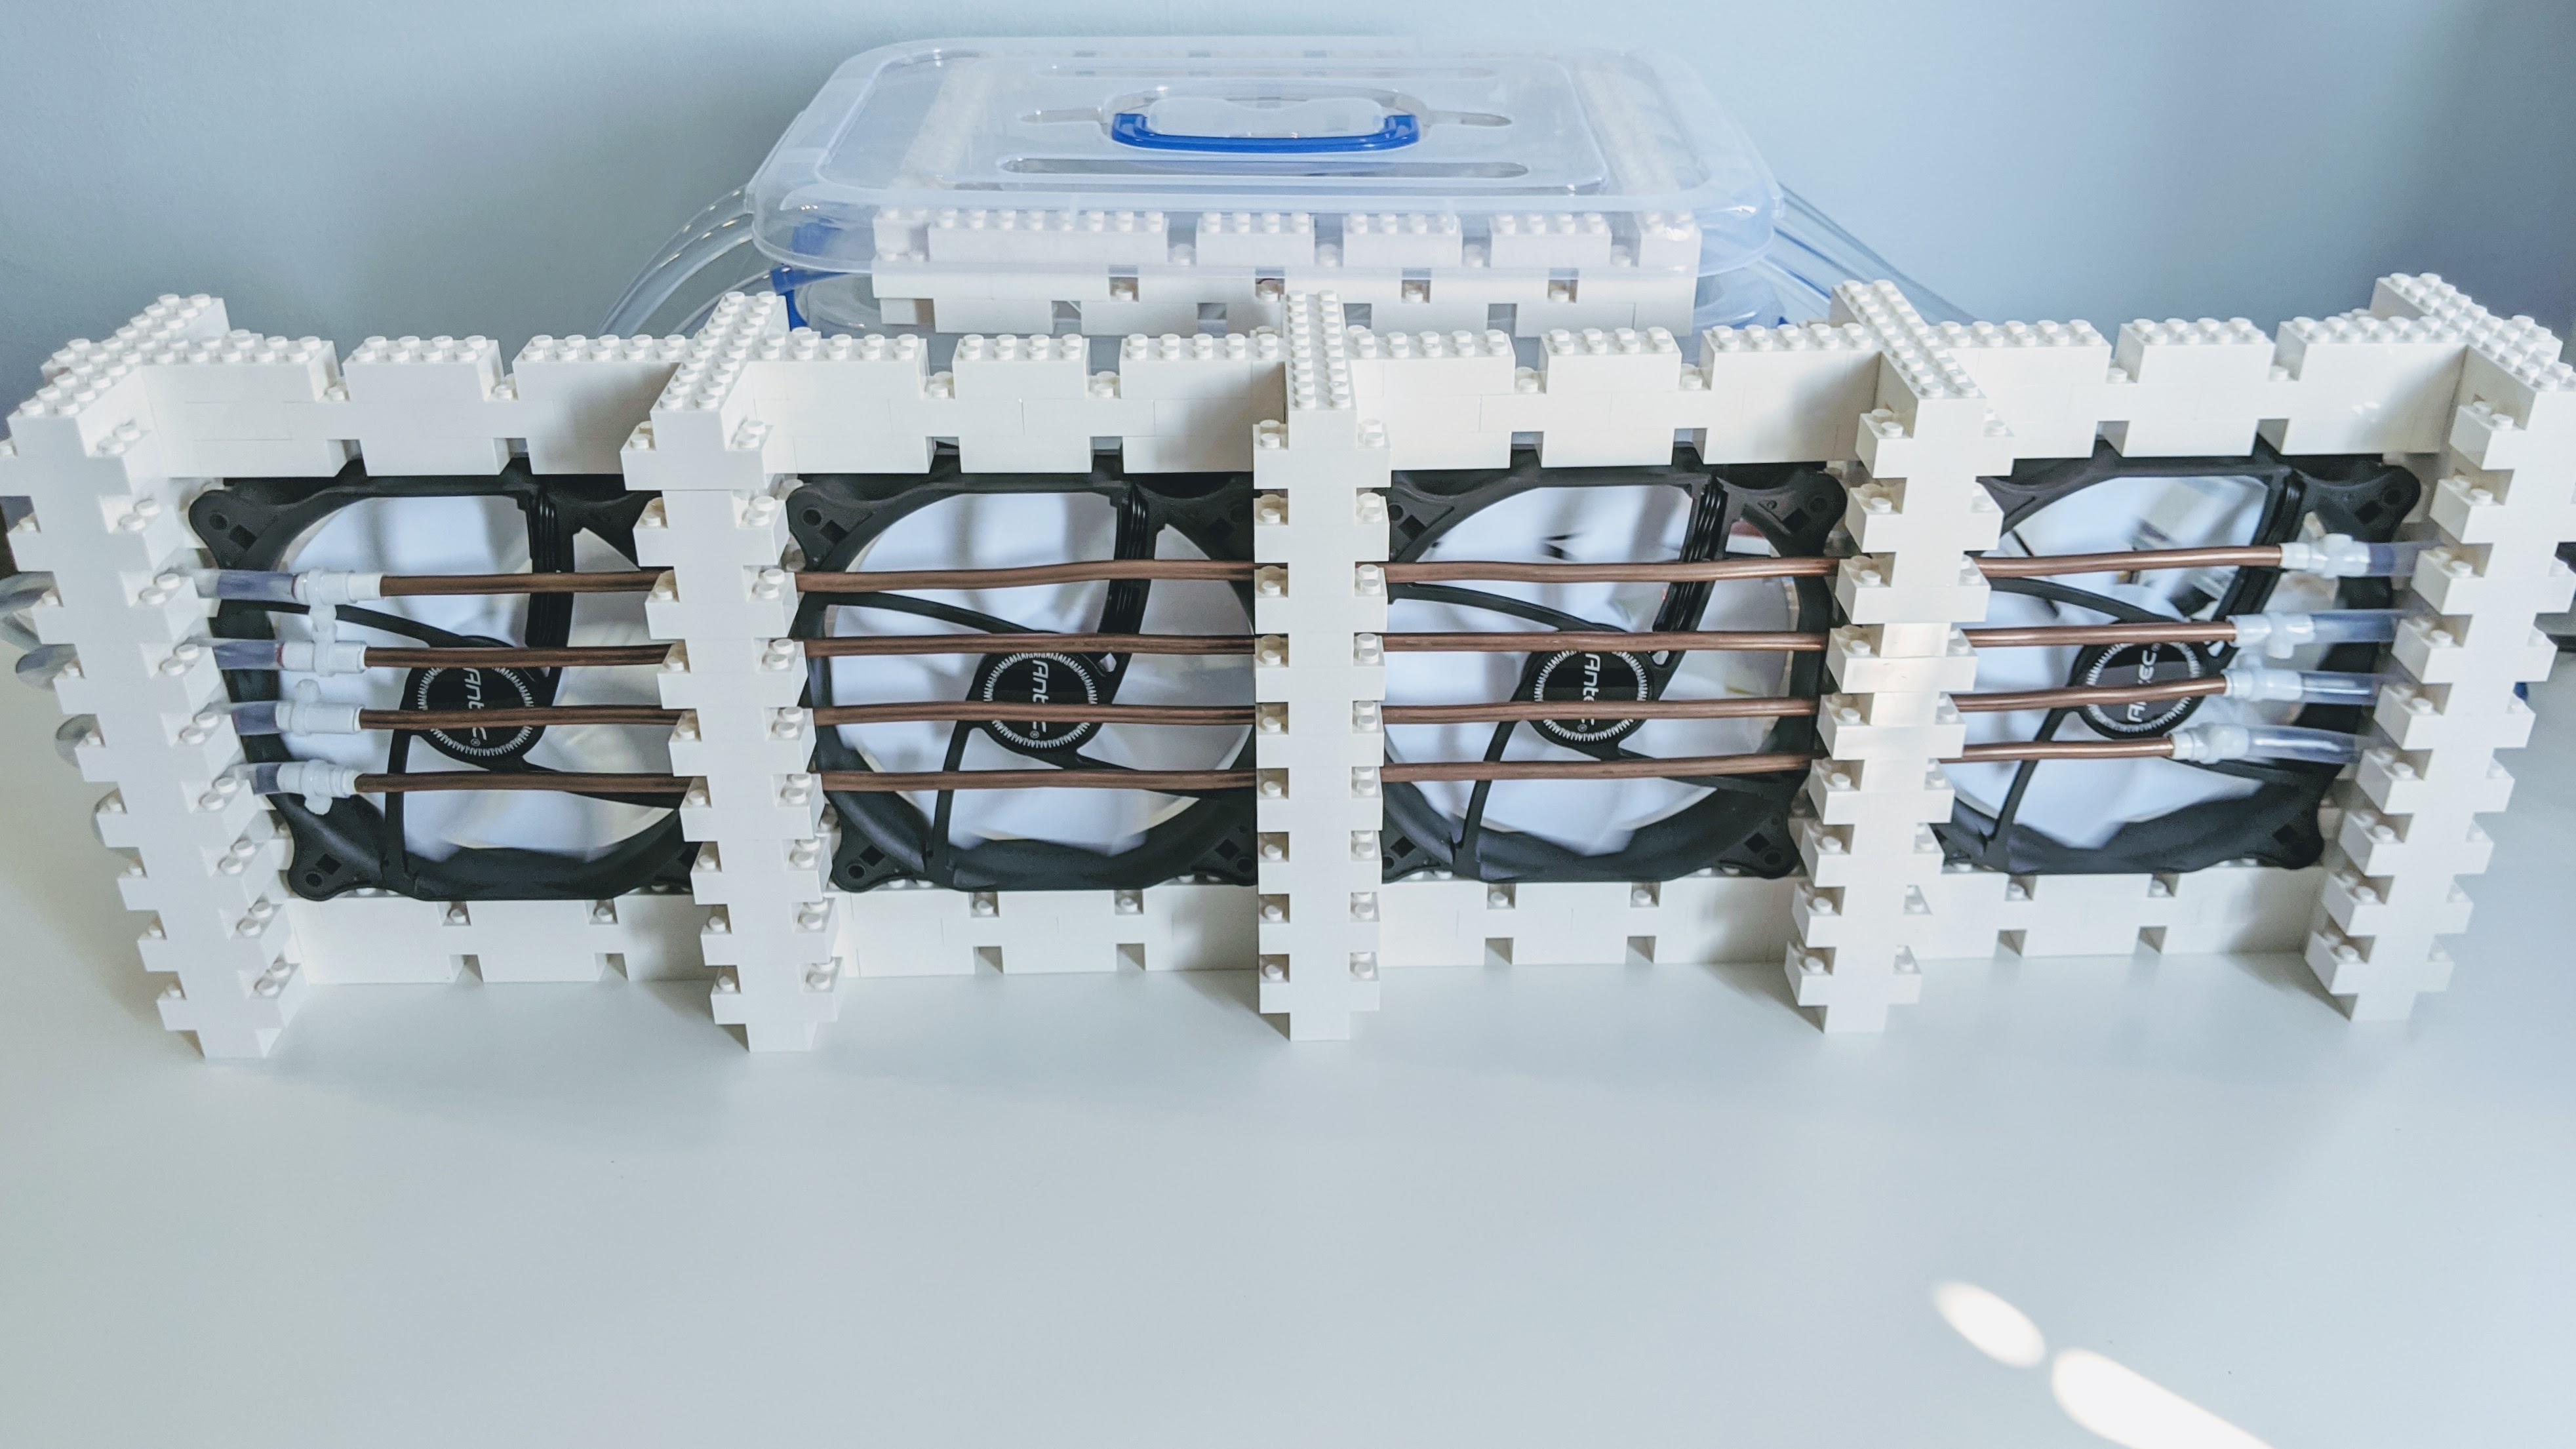
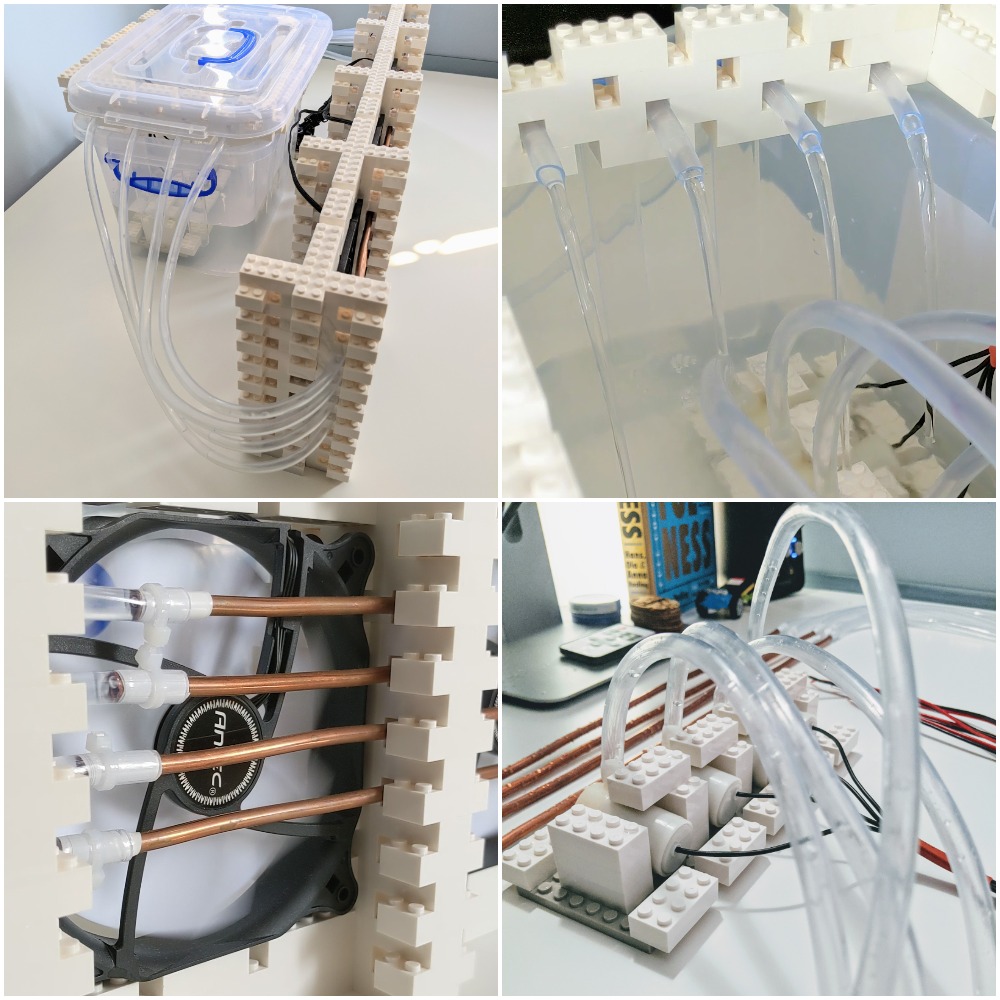 This was the funnest part as I didn’t really test or plan this out before building it. I just got a bucket of Lego and started trying to see how I could secure a PC fan using Lego to hold it up straight. Then combining 4x of those together to make a much wider air flow system. What worked out really great was that the copper pipe was just under 1x1x1 Lego block big which meant I could securely feed the copper rod through a Lego hole while maintaining a super sturdy design.
The PVC piping also fed nicely through the gaps in Lego and allowed me to build a frame above the water tank to evenly space out each pipe so that the water is input & output enely through the tank. Having the pipes distributed evenly makes sure warm water is always mixed with the cooler water before being pushed back around the pipes. The original plastic lid to the bucket also snaps nicely onto the Lego to help avoid dust getting into the water system.
Stopping it leaking
 I’ve done plenty of hardware projects before, but none where i’m directly shooting water around which gets really messy when you’ve also got a lot of exposed electronics and cabling going on! It’s really worrying when you’re half way through soldering something to find a small puddle of water closeby too.
The big issue I had was that the PCV piping I was using was much larger than the copper tubes, so I had to find a way of securing them together so that water could pass through them without any leaking. It took some time but eventually I figured out a way of using electrical tape to thicken the girth of the copper pipe, feeding the PVC pipe around the copper pipe and then adding a zip tie to tightly maintain a seal so water wouldn’t leak. It took some trial and error but eventually it worked out and there was no leaking.
The final result
 It not only works but it works perfectly! It’s able to consistently push out cool air, it’s quiet, cheap and low powered and of-course - it’s made of Lego and so looks badass.
 I think the only upgrade or improvement would be to use higher powered fans as these were pretty weak in terms of airflow, I guess that’s what you get from fans specifically designed to quietly cool your computer but i’m still super happy with the end result.